Web Standalone Export
Web Standalone Export
Overview
Enscape’s Web Standalone removes the requirement for high end graphics cards, as the Web Standalone exports is rendered in the browser using WebGL 2.0. To create a Web Standalone, Enscape needs to be running as the Export Web Standalone button is available from within the toolbar in the Enscape viewport.
You will need to click the small arrow next to the Executable Standalone to reveal a drop down menu where the option Web Standalone is located. This is the process each time you want to create a Web Standalone.

Export Web Standalone button
Export a Web Standalone
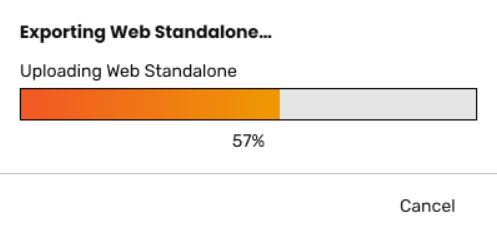
Once you are ready to export a Web Standalone clicking on the Export Web Standalone button will result in a dialogue box opening. This will indicate the progress of the upload of the Web Standalone Export. This is the same dialogue box for all CAD’s that Enscape is provided for.

Export Web Standalone uploading progress bar
Your default browser will open and you will be notified in the browser that the server is still processing the data for the Web Standalone Export, and an option to reload the file if it fails the first time.

The browser notification that the Web Standalone Export is loading
Once the server has finished processing the data, your default browser will open. Once the Standalone has loaded in to your browser it will automatically display your project from the same position that was showing in the Enscape window.
The Help Overlay appears automatically when the web standalone is opened. You can toggle it on and off using the H key on your keyboard. Movement in any direction can be controlled on your keyboard via the arrow keys, and the E and Q keys to move up and down, respectively. To speed up the movement somewhat, hold the Shift key; to speed it up even more, hold the CRTL key. Toggle between Fly and Walk mode with the spacebar. Pressing M turns the mini map on and off. To generally rotate the view, click in the window with your left mouse key and drag in the desired direction. Adjust the time of day by pressing shift, holding the right mouse key, and moving the mouse.

Help Overlay in the Web Standalone

Enscape is available in your browser window
Administration - 4.1.1 onwards
Back in the your CAD, you can administer your Web Standalones by clicking on the Upload Management button ![]() in the Enscape ribbon.
in the Enscape ribbon.
Once clicked, a new window named Chaos Account will open. Click on the tab named Upload Management on the left sidebar. Now click on the Web Standalones’ tab which will list all the Web Standalones that you have created, categorized by project.

Chaos Upload Management dialog showing the Web Standalones' tab
Here, you can click on the Web Standalone and the link will open in your Web Browser. Additionally, once you hover over the web standalone link, you will find a button to copy the link to your clipboard as well.
Administration - Prior to 4.1.1
Back in the your CAD, you can administer your Web Standalones by clicking on the Upload Management button ![]() in the Enscape ribbon.
in the Enscape ribbon.
Once clicked, a new window named Chaos Account will open. Click on the tab named Upload Management on the left sidebar. Now click on the Web Standalones’ tab which will list all the Web Standalones that you have created, categorized by project.

Chaos Upload Management dialog showing the Web Standalones' tab
Here, once you hover over the web standalone link, you have 3 buttons to allow further administration of your Web Standalones. From left to right, Replace another uploaded Web Standalone in the Cloud with this…, the Copy link, and Delete Web Standalone.
Replace a Web Standalone
Clicking on the Replace another uploaded Web Standalone in the Cloud with this… button will result in the associated Replace Web Standalone in Cloud dialog to open, where you are asked to choose the Web Standalone to replace.
NOTE: you can replace Web Standalones that have been exported from different projects and these will retain the URL / link associated with the Web Standalone being replaced / deleted.

Replace Web Standalone dialog
Once you’ve selected the file to replace, you will be asked to confirm the details of the exchange.

Details of the Web Standalone to be replaced
And then a final confirmation dialog to proceed, as the Web Standalone to be replaced will be deleted entirely.

Final confirmation to replace a Web Standalone
If successful, you will receive a confirmation notice that the Web Standalone has been replaced.

Replacement of Web Standalone successful
Additionally, please refer to this article that explains how you can further manage Web Standalone files via your Enscape Account Upload section.
Embedding the Web Standalone
You can embed the Web Standalone in to your own webpage, if you require to monitor the amount of people viewing your project for instance. This can be done by embedding the URL into an iframe using the following script in your webpage.
<script defer type="text/javascript"
            src="data:text/javascript,document.getElementById('collab-frame').addEventListener('mouseover',function(e){e.target.focus()});"
        ></script>
        <iframe
            id="collab-frame"
            width="850" height="550" style="border: 0;" scrolling="no" loading="lazy"
            src="<your web standalone URL placed here>"
            allow="fullscreen; xr-spatial-tracking;" referrerpolicy="strict-origin"
        ></iframe>
Technical Limitations
If your browser is WebGL2.0 compatible, Enscape Web Standalone files should work. However, there are still some limitations of the Web Standalone Export to observe:
- Render Quality is limited to be the equivalent of ‘Draft’ mode
- Both fog and the Enscape grass material are disabled
- Rendering of transparent materials is currently simplified
- Currently, no support for Internet Explorer/Edge/Safari or iOS devices (iPhone, iPads)
- Performance of larger projects may be of a lower quality than in the full version of Enscape
- Enscape Settings are disabled
- Favorite Views are disabled
- Light View mode is disabled
- Customization: Only Interface Overlay is supported
- Touch controls are currently very basic
- A maximum file size is capped at 500MB
- No VR mode
- Texture resolution is limited to 512*512

