Enscape License Activation
Enscape License Activation
Overview
Enscape version 4.1 uses a new licensing system that requires authentication with a Chaos account.
If you are a single license holder, you will be prompted to login during installation, or you can log in directly from within Enscape.
If you are using floating licenses, your IT administrator needs to install the new License Server centrally within your network and you simply need to configure Enscape to connect to it, which you can do by choosing “remote” licensing during installation, or by using the external “Change License Settings” utility. Your IT administrator needs to authenticate the License Server with the company account that holds your floating licenses.
Click here to learn more about managing your user account.
Chaos License Server
All Enscape versions from 4.1 onwards need to be connected to a Chaos License to function on your machine. Chaos License Server provides licensing without the need for any physical devices. The Chaos License Server’s interface is accessible in a web browser. There are a few convenient ways to open the interface. When the Chaos License Server is installed and running on the same machine, from which you’re trying to access the interface, you can do one of the following:
- Open your browser and type http://127.0.0.1:30304
- Alternatively, on Windows only, you can open the Manage Chaos License Server link from:
Start Menu > All Apps > Chaos > Manage Chaos License Server.
When the Chaos License Server is installed and running on another machine in your local network, open a browser and type the IP address of the machine where it’s running, followed by the 30304 port number. For example: http://10.0.0.100:30304/

Chaos License Server
Within the Chaos License Server, you can browse and sort through all of your Chaos licenses and check their availability. To do so, click on the product you have a license for, and expand the menu to see more details.

Selected Product Menu
You can filter through Online and Offline licenses that are Available or In Use for the selected product, using the dedicated buttons at the top of the expandable menu.
The licensing system allows you to use seats associated with your Chaos account easily from anywhere you can log into over the Internet, and the filters will distinguish the status as online or offline. However, offline licenses also reflect borrowed licenses that are available or in use offline.
License Setup
The Unified Login Application (ULA) is integrated into the License Server installation. The ULA allows Single Sign On for all ULA-integrated Chaos desktop apps. Signing in to any of the Chaos applications will automatically log the user in all other Chaos applications installed on the machine.
While installing Enscape, you will be asked to specify a license type. You can choose between Local and Remote.
- Local – Single license holders of fixed licenses can use the default installation option, which installs a local License Server on their device. For the Local installation type, an installation and activation is required.
- Remote – Floating license users can install a centralized License Server and share floating licenses for anonymous access.
The Chaos License Server can also be downloaded separately.
Enscape versions 4.0 and older
Enscape versions prior to 4.1 will continue being used for as long as your subscription is active. Existing versions of Enscape do not require a login. Your Enscape Account window may show limited information in the licensing tab though.
Once you have purchased a subscription, you will then receive a License Key that you will need to input to activate Enscape. There are no License Keys required to run Enscape in Trial Mode. To activate an Enscape License Key, whether Fixed Seat or Floating, open the Enscape Account ![]() window via the Enscape ribbon in the CAD you’ve installed Enscape for. Then, click the Licenses button.
window via the Enscape ribbon in the CAD you’ve installed Enscape for. Then, click the Licenses button.

Licenses button
This will then open the window which shows the License Details. The following shows the details available in the license window and the button to enter a license key.
Click on the Enter License Key button which will open the window where your License Key can be entered. When copying your License Key, make sure to copy the full License Key and make sure that there are no additional spaces or letters copied. We recommend you paste using the Paste from Clipboard option.

Enter Enscape License Key window
Then click on Apply License to activate the license.

Apply License button
If the activation is successful, the notification will state: Thank you for using Enscape! You can then click on the OK button to close that window.

Confirmation that the Enscape License Activation was successful. You can now use the full version of Enscape!
The User Account (Sign in) button, as highlighted in the following screenshot, is only for use with the User Management feature that you will find documented here.

User Account (Sign in) button
If you are using a Floating License and receive a message stating you have exceeded the number of seats, this can be caused either by there being no seat available (Enscape is open on another machine on your network) or because you are unable to connect to our Licensing server to confirm the License Key. If you have problems connecting to the Enscape Licensing server, then you may need to add proxy server information or add exceptions to your Firewall. To do that, please refer to this article.
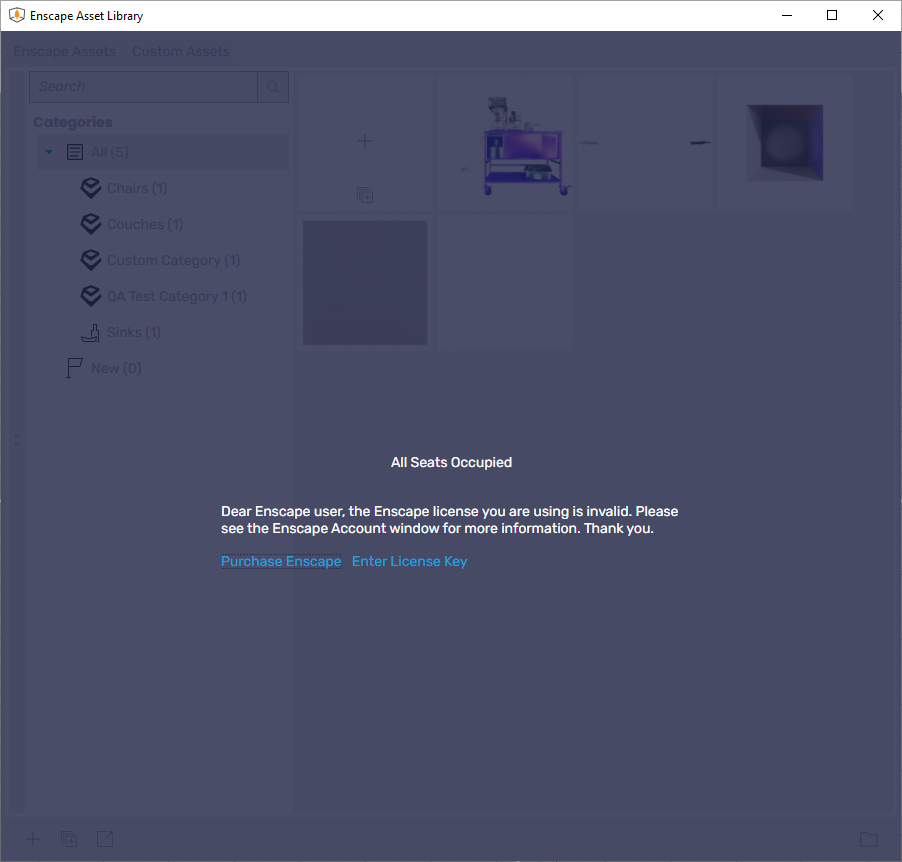
Please note that when there is no seat available on a Floating License, all core features of Enscape are blocked and a notification is displayed, as is also the case when a License Key or a Trial License expires. Core features of Enscape include: the rendering engine itself (Enscape Viewport), Material Library, Material Editor, Asset Library (including the Custom Asset Library), and lastly, Enscape Objects (SketchUp only). In such a case, you will need to wait for a seat to become free, or contact your license administrator if the seat count on a License Key requires increasing.

All Seats Occupied notification
Remove a License Key
To remove or deactivate an Enscape License Key, for example when you need to move the license to another machine, open the Enscape Account ![]() window via the Enscape ribbon in CAD and click the Licenses button. Then, click the Remove License Key button, which will unbind the license key from that machine whereby, if the license key is a Floating License Key, activation of the license / seat on another machine will then be possible. If it’s a Fixed Seat License Key, there will be two buttons available: clicking the Remove License Key button will simply remove the license key on that machine, as is with the Floating License Key. The other button that will be available is a toggle displaying your license state as License Active. You can click the toggle to change the state to License Inactive and it will simply deactivate the license key but will not remove it. This means you’ll be able to reactivate the license key on the same machine at a later date by clicking this toggle and you won’t have to paste the license key in again.
window via the Enscape ribbon in CAD and click the Licenses button. Then, click the Remove License Key button, which will unbind the license key from that machine whereby, if the license key is a Floating License Key, activation of the license / seat on another machine will then be possible. If it’s a Fixed Seat License Key, there will be two buttons available: clicking the Remove License Key button will simply remove the license key on that machine, as is with the Floating License Key. The other button that will be available is a toggle displaying your license state as License Active. You can click the toggle to change the state to License Inactive and it will simply deactivate the license key but will not remove it. This means you’ll be able to reactivate the license key on the same machine at a later date by clicking this toggle and you won’t have to paste the license key in again.

Remove an Enscape License Key
If you have reinstalled the operating system without removing the License Key beforehand, or if you have uninstalled the CAD and therefore can no longer access the Enscape Account ![]() button to deactivate the license, even though Enscape is still installed on the machine, or if you have problems with activating / deactivating your Enscape License Key in general, even after checking your proxy settings and firewall exceptions, then please contact support through the Help Center.
button to deactivate the license, even though Enscape is still installed on the machine, or if you have problems with activating / deactivating your Enscape License Key in general, even after checking your proxy settings and firewall exceptions, then please contact support through the Help Center.

