Best Practices: Lighting in SketchUp
Introduction
How do you elevate your model, and create an experience the viewer will never forget? Lighting is crucial to creating not only realistic scenes, but also to leaving a lasting impression and conveying a certain feeling. All lights are not equal, and it is not surprising that many users are in the dark about which light best suits their needs. This post will provide an overview of the lighting options available via the Enscape Objects window in SketchUp: spot light, sphere light, rectangular light, disk light and linear light.
The aim is to provide you with useful information and helpful tips to take your scenes to the next level. For a more focused, but equally illuminating discussion of lighting techniques in SketchUp, take a look at Dan Stine’s blog post on the topic. He recently also wrote a similar post for Revit users. Let’s get started!
Types of Lights in SketchUp
There are five different lights you can add via this window:
Once you successfully add a light to your project, you will be able to fine-tune various settings for the individual lights in this window. In addition to lights, this window also allows you to add sound sources and proxies to your model.
Let’s take a closer look at the five different lights you can add in SketchUp. All of the lights can be placed with the easy 2-Click System; even if you’ve never placed an Enscape light before, you can learn it in seconds! It is important to note that while Enscape has a good performance impact in relation to lights, real-time rendering can’t process an unlimited number of light sources. How smoothly your project runs comes down to a combination of your hardware, the size of your project, and the number of lights. The number and intensity of your light sources will impact the performance greatly, especially if the lights overlap.
Spot light
A spot light is fairly self-explanatory; it functions similarly to a spot light in real life and provides a very direct source of light. A spot light is a cone of light which emits light from a single point in one direction (Image 1). By changing how wide the cone angle is, you can control how much of your scene is actually illuminated. The width of the cone can also determine whether the light is hard or soft.
Practical uses for spot lights include store displays, desk lamps, street lights or stage lighting. They can also be used in a scene to create dramatic lighting effects, as they are useful for creating an obvious falloff from light to dark.
Placing a Spot Light
To add a spot light, select it in the Enscape Objects window. I’m going to place a spot light in my project to add a bit of drama to a rooftop terrace. There is already geometry in place representing light fixtures along the edge of the roof.
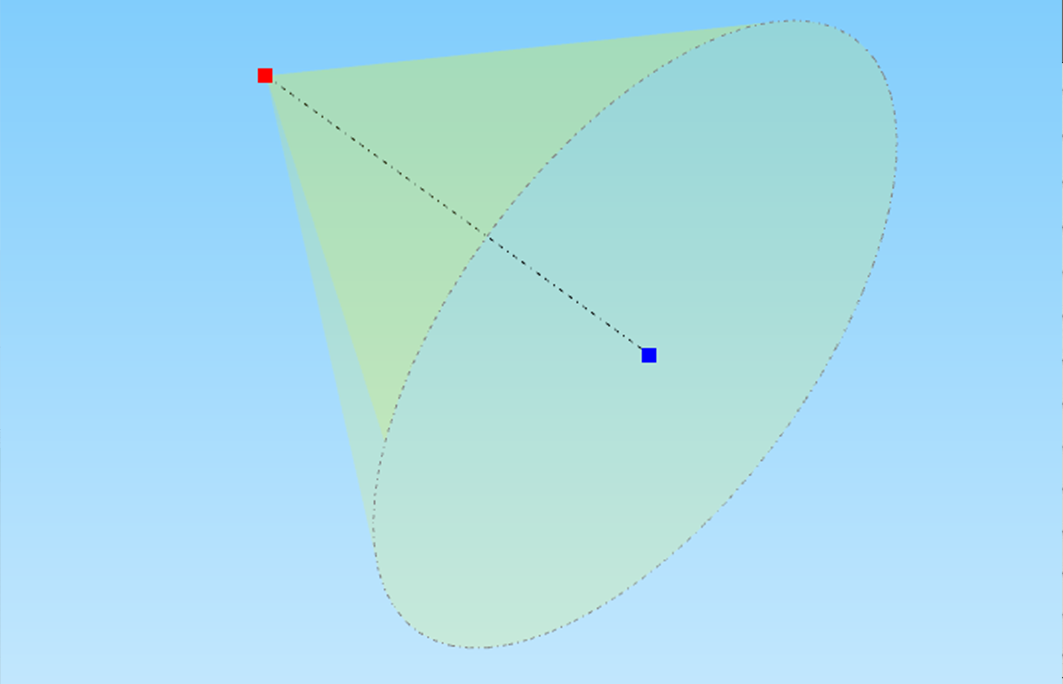
1. Light cone of a spot light
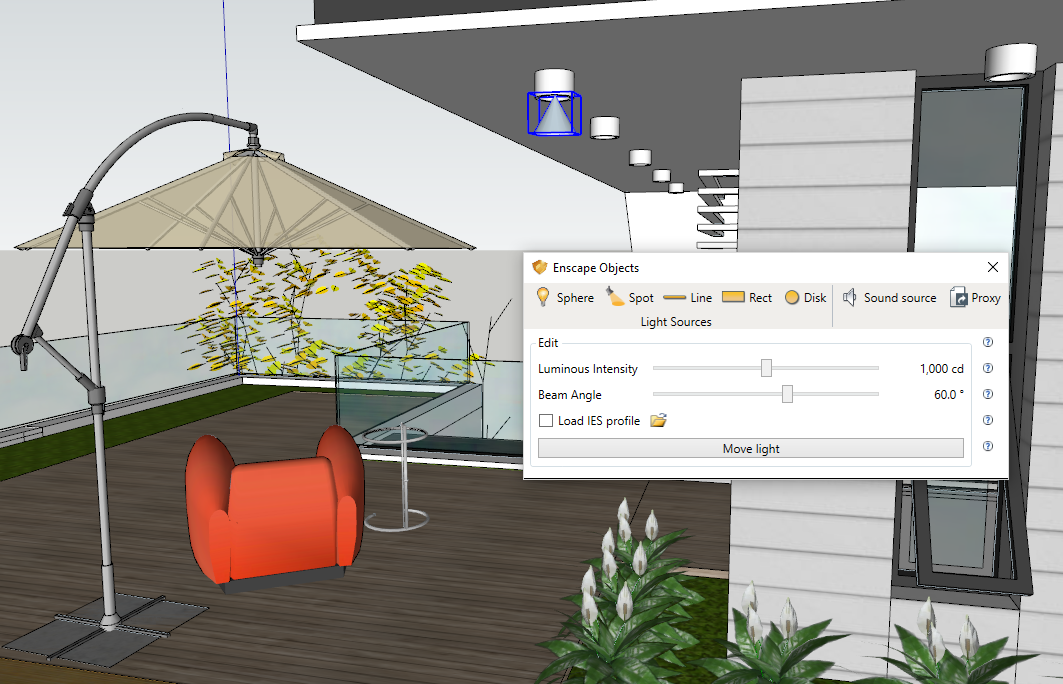
2. Placed spot light and Objects window with adjustable settings
A spot light can be placed with four clicks: two to determine the endpoint and two to determine the direction of the light cone . Click once to place the endpoint of your light. You can then decide whether to slide the light along a certain axis. Do so and click again to affix the light source. On the third click, you will have the opportunity to determine the point you want to illuminate. Adjust to the desired point and click one last time.
It is important not to place any of your light sources directly on the surface of your geometry, but just before it. If you set it directly on the surface, the light could become obscured by the geometry. This is why the 2-Click System is so efficient. In two clicks you can define the endpoint and ensure the light source is in front of the geometry, and in another two, set the angle and range. You can also use the Left, Up and Right arrow keys between the first and second clicks to set a specific axis direction.
You will see the light represented as geometry in SketchUp (Image 2). As soon as you have placed the spot light, you will be able to edit two settings in the Enscape Objects window: Luminous Intensity and Beam Angle. The Luminous Intensity slider allows you to adjust the brightness and maximal range of the light, measured in candelas. The Beam Angle slider controls the width of the beam, in degrees. If you have an IES profile you would like to use, you can load it via the Enscape Objects window by clicking Load IES profile.
Check out what our spot light looks like on the roof (Image 3). Kind of lonely, right?
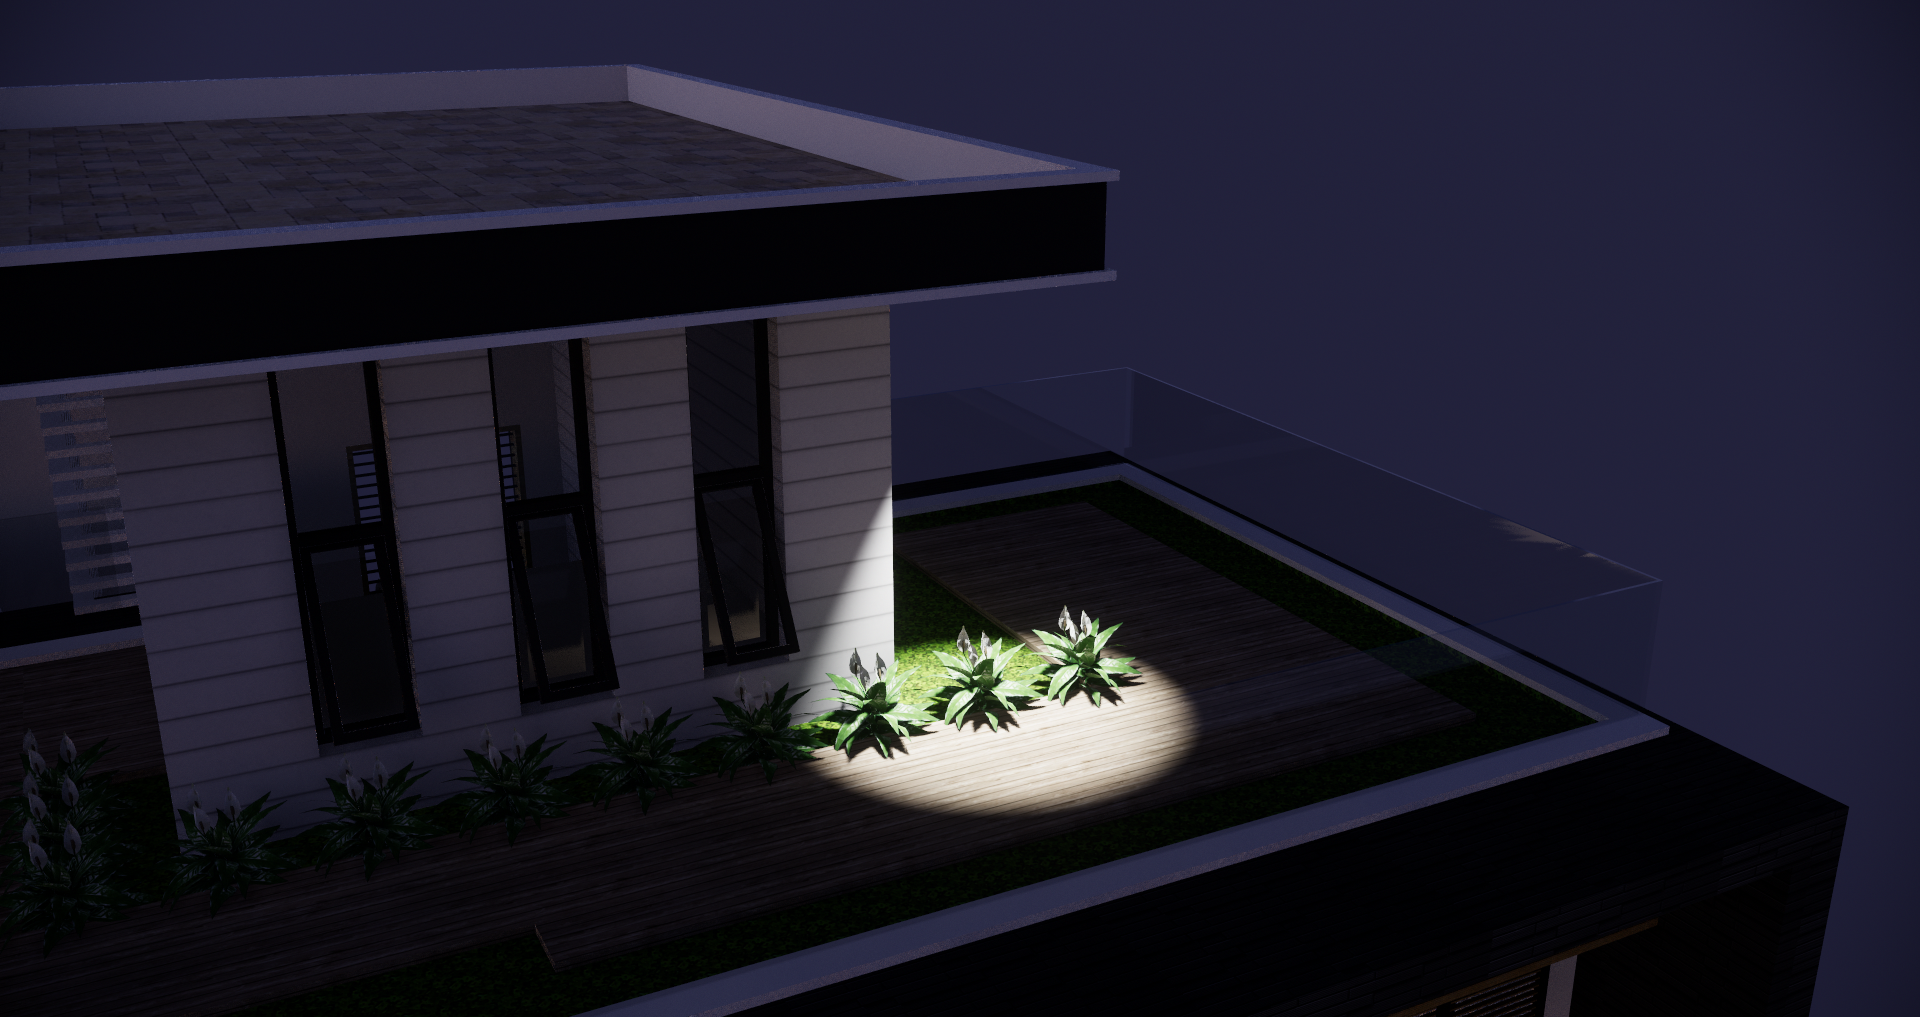
3. Single spot light
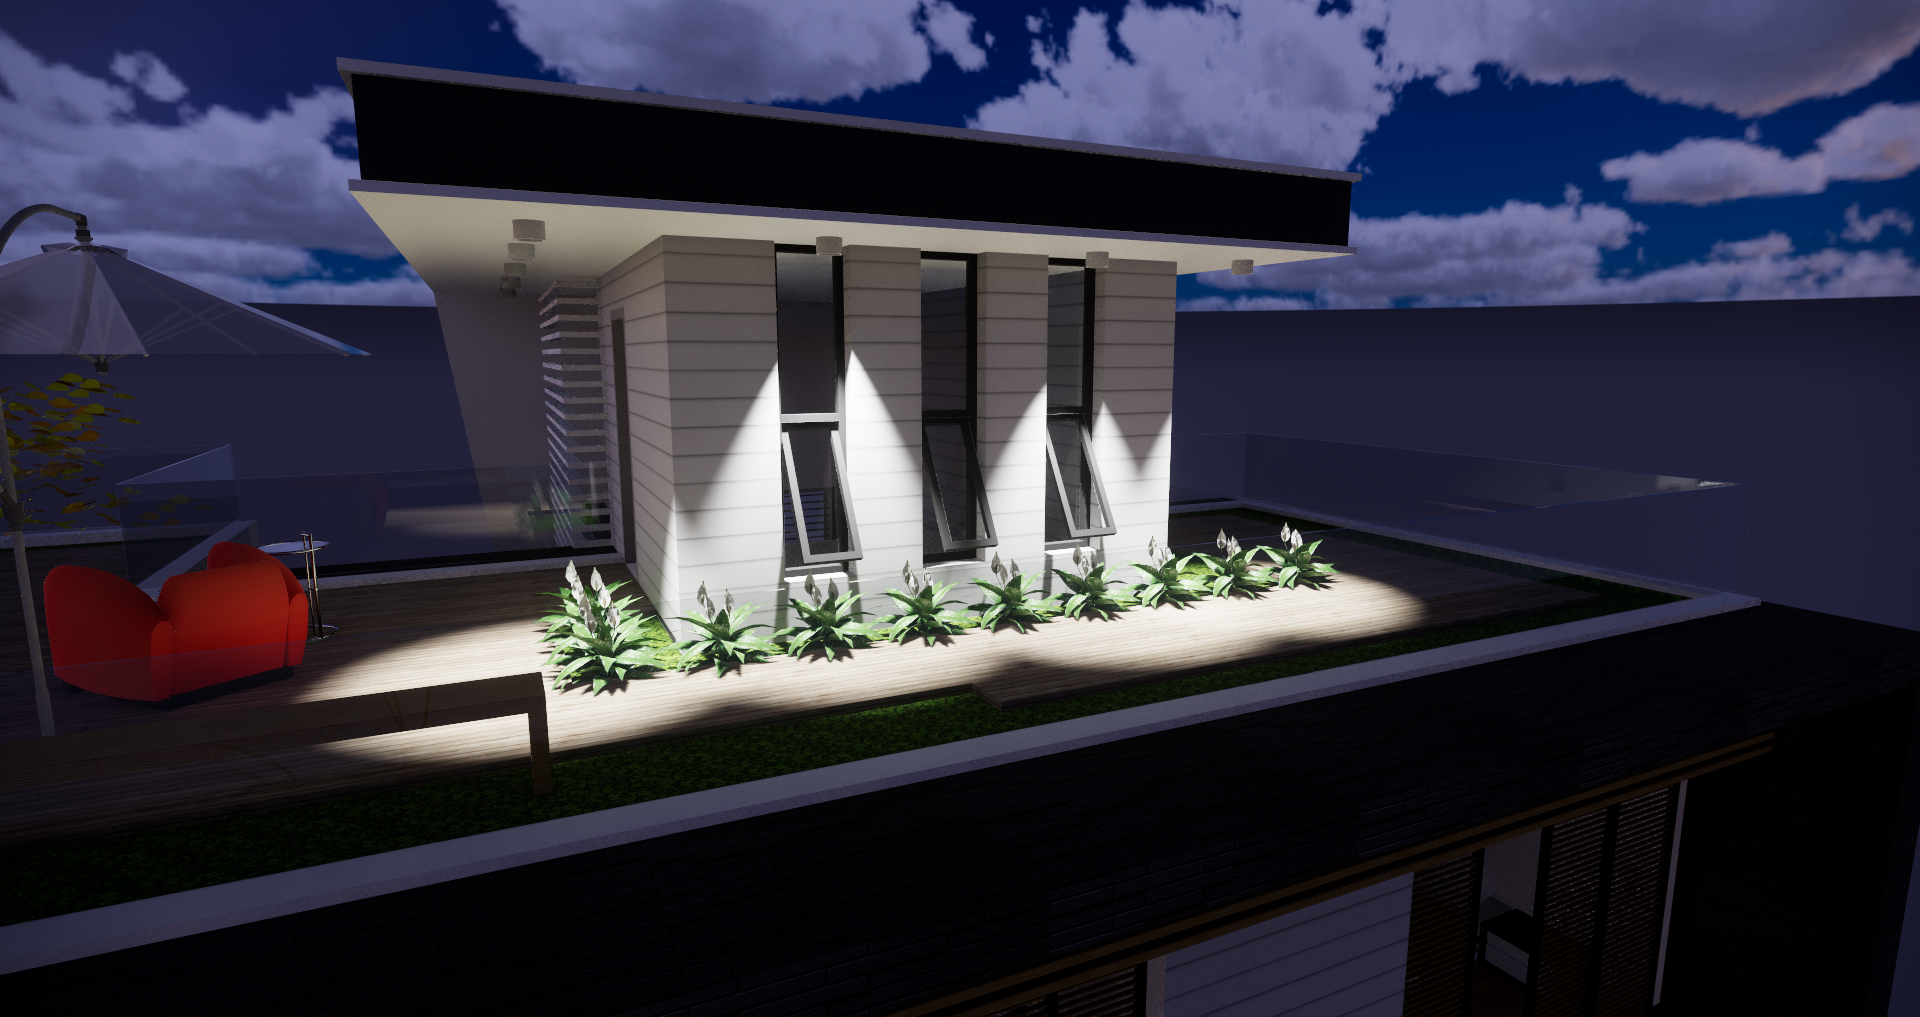
4. Four spot lights placed using Copy/Paste
A great tip for all light sources is that you can copy and paste them, adding efficiency to your workflow. For instance, continuing the example from above, one spot light does not light up the scene effectively, and there is geometry existing for four lamps across the front edge of the roof. Instead of placing each spot light individually, just select the light you have already placed and copy it, using CTRL-C or the Copy option in the Edit menu. Paste the copy in using CTRL-V or the Paste option in the Edit menu.
Copying ensures that lights that should look the same have identical settings, without any extra effort (Image 4). You can also group your light geometry together with the components or fixtures they are placed in. This way, you can quickly place lamps that already contain a light source. Just select the elements while holding the Shift key, then right click on one of them and select Make Group.
Sphere light
Let’s take a look at the sphere light next. In its default state, the Enscape sphere light is a point light, which sends light out from a single point in space, equally in all directions. In this way, the effect it gives is similar to a common incandescent light bulb. Sphere lights are useful not only because they can simulate light sources like light bulbs or candles, but also because they can be used to light areas with a gentle falloff in all directions.
Placing a Sphere Light
Most sphere lights can be placed with just two clicks. The scene below doesn’t currently contain any light sources (Image 5). But say I want to place a sphere light into the lamp next to the couch, so that the room will be illuminated even if I change the time of day to night.
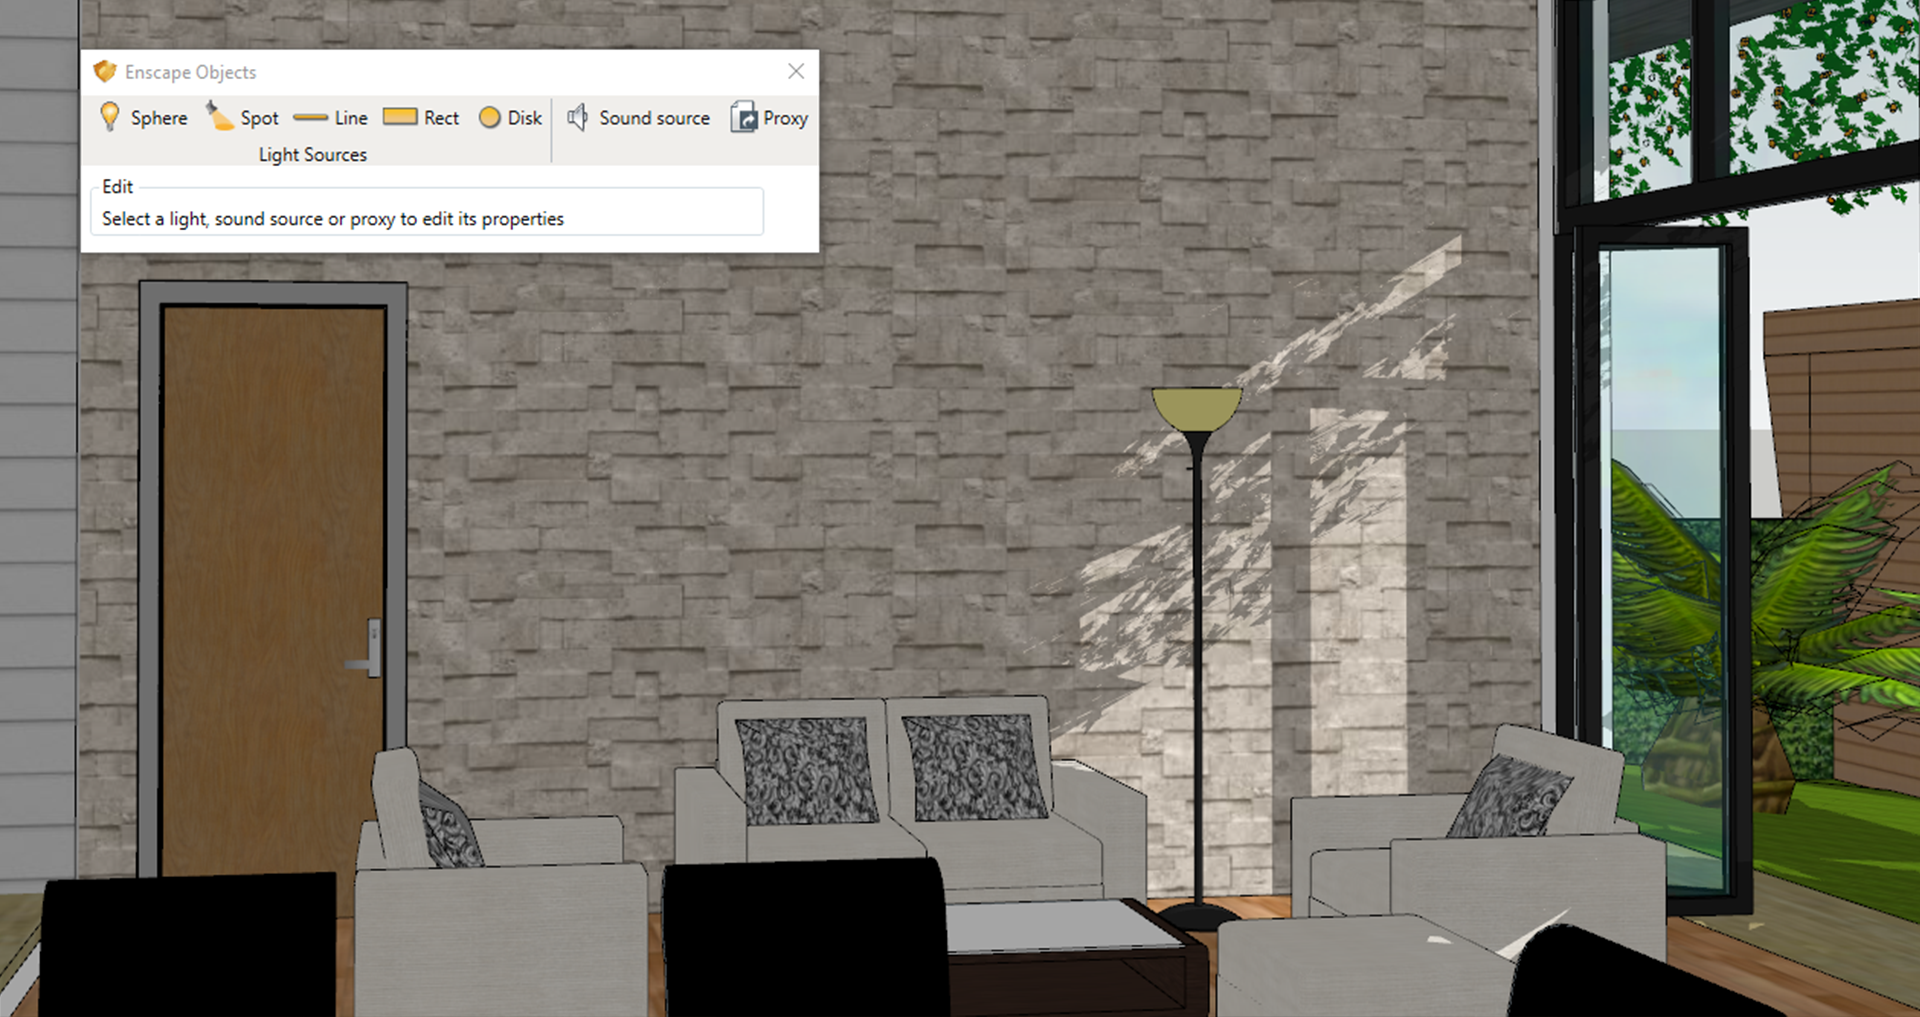
5. Empty light fixture in SketchUp
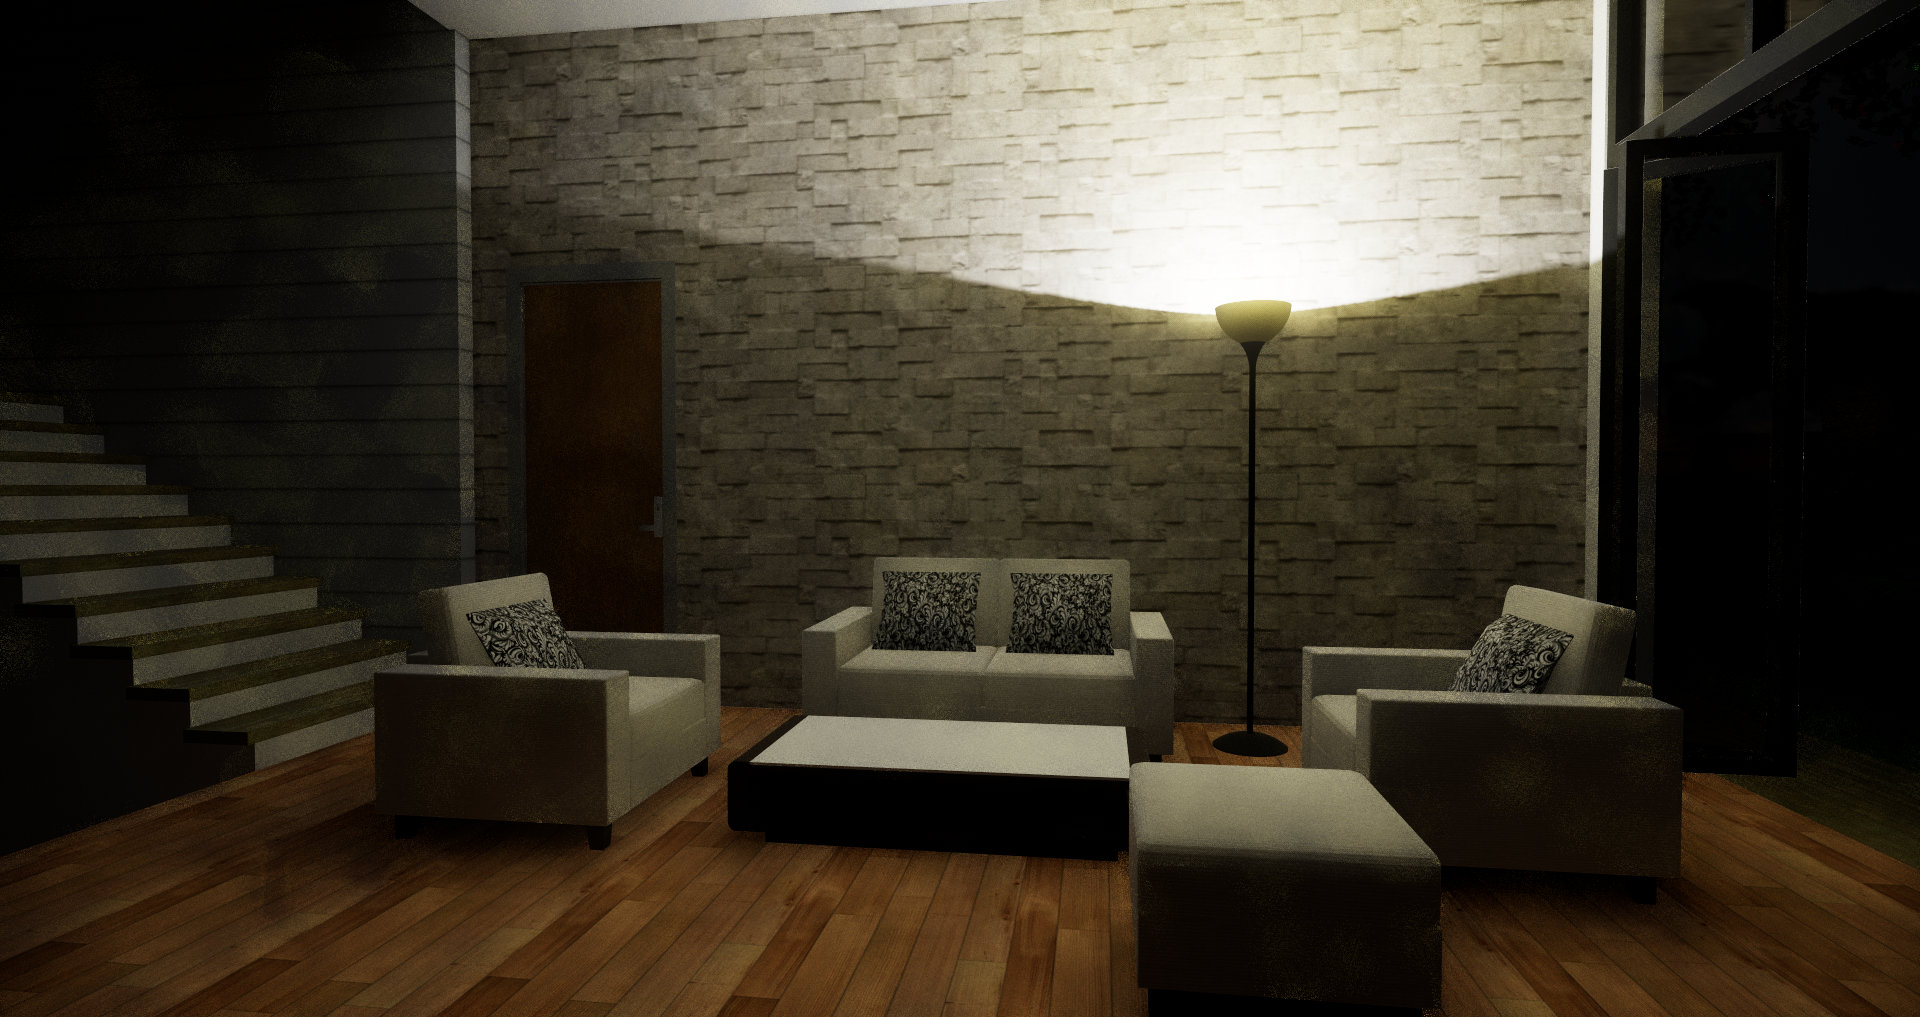
6. Placed sphere light at night
Click Sphere in the Enscape Objects window. Click once to place the endpoint of your light, then click again to place the light (Image 7). You will now see the light source geometry in the lamp (Image 8).
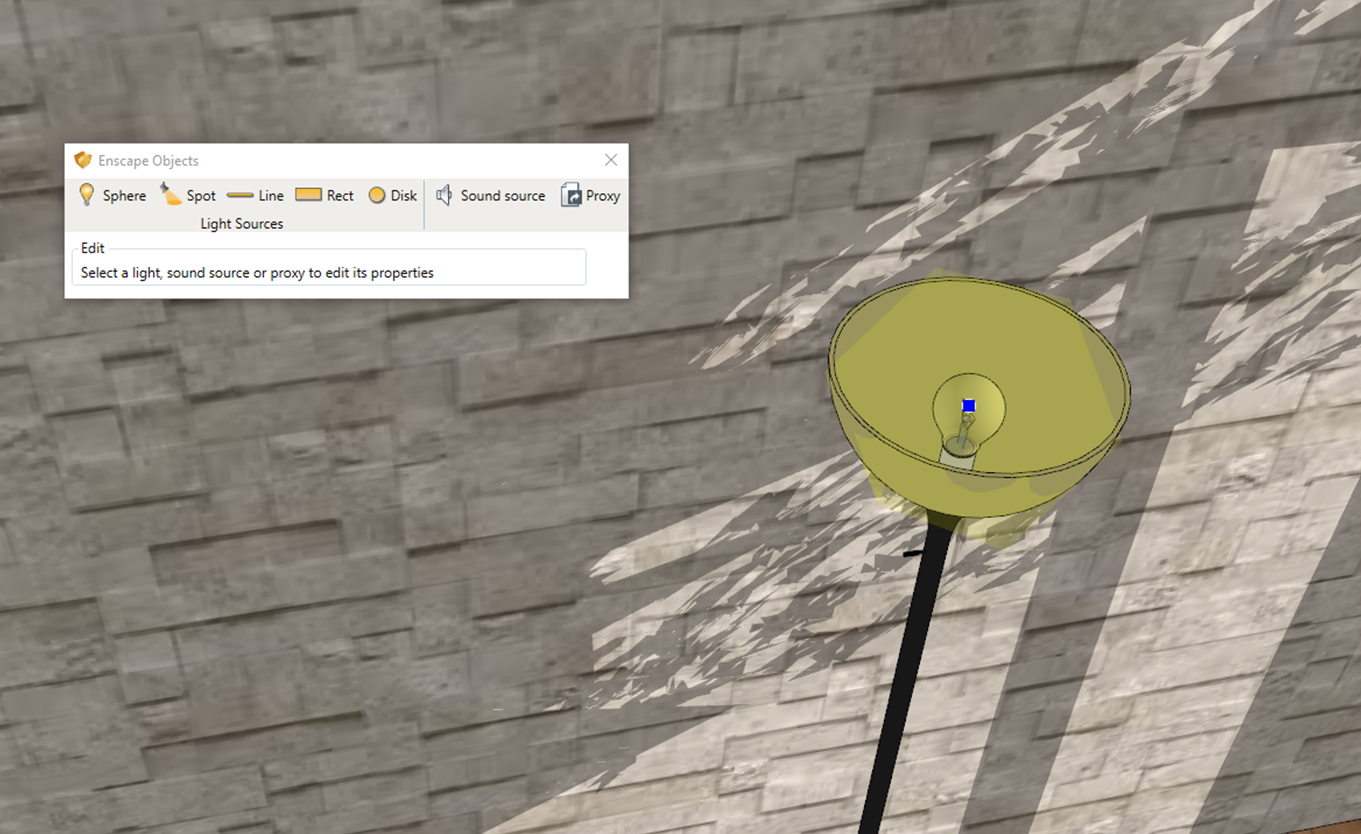
7. Placing the endpoint of a sphere light
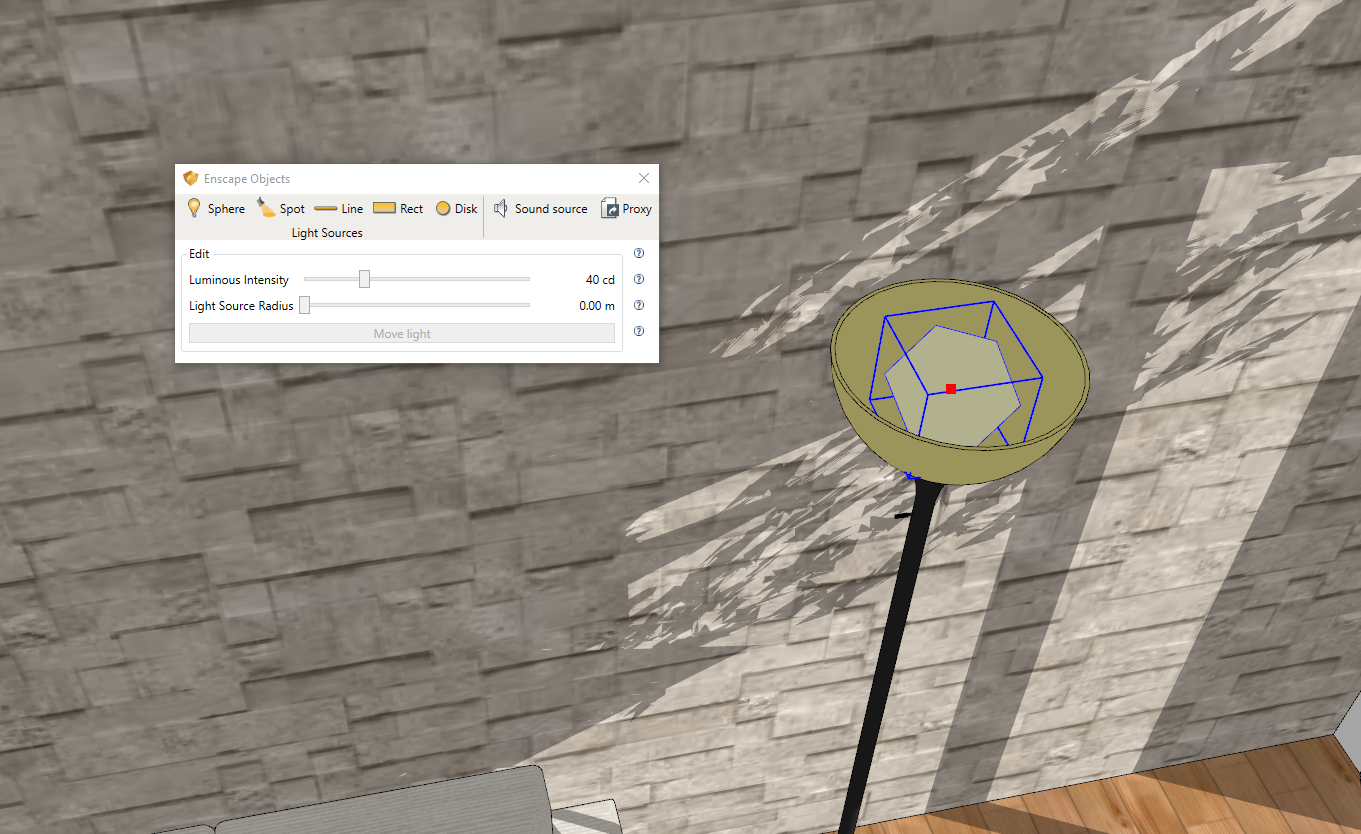
8. Sphere light geometry
When you have placed the geometry, you will again be able to edit the luminous intensity, to avoid being blinded by the light. With the sphere light you also have the option of adjusting the Light Source Radius slider. This controls the size of the source in meters, though this is only visible in reflections.
Lights are always on in Enscape, however, during the day it may appear as if some of them have turned off. This is actually not the case; the intensity of the sunlight simply crushes all other emitting lights. A solution for this is to greatly turn up the luminous intensity of the sources you want to be able to see during the daytime.
Now that the sphere light has been placed, the lamp will appear to be on at night in Enscape, as you can see above (Image 6). The sphere light effectively mimics how this type of lamp would light a room in reality.
Rectangular and disk lights
Next up are two similar lights: the rectangular and disk lights. These are area lights; this means that they do not emit light from one, infinitely small point in space, like the spot or point light. Instead, they emit light across their surfaces uniformly, resulting quite literally in an entire area of light. Because an area light emits from across its entire surface, it tends to produce light that is softer and more subtle than other lights. It produces a diffuse light with softer, less dramatic shadows (Image 9).
Because of this, an area light has ample uses. Perhaps the most tangible use case example of an area light is to create a florescent light fixture, like the ones you find in any office building. Similar practical applications include light banks, backlit panels, and florescent tube lights, but they can also be used for more atmospheric lighting, for instance light shining in through a window.
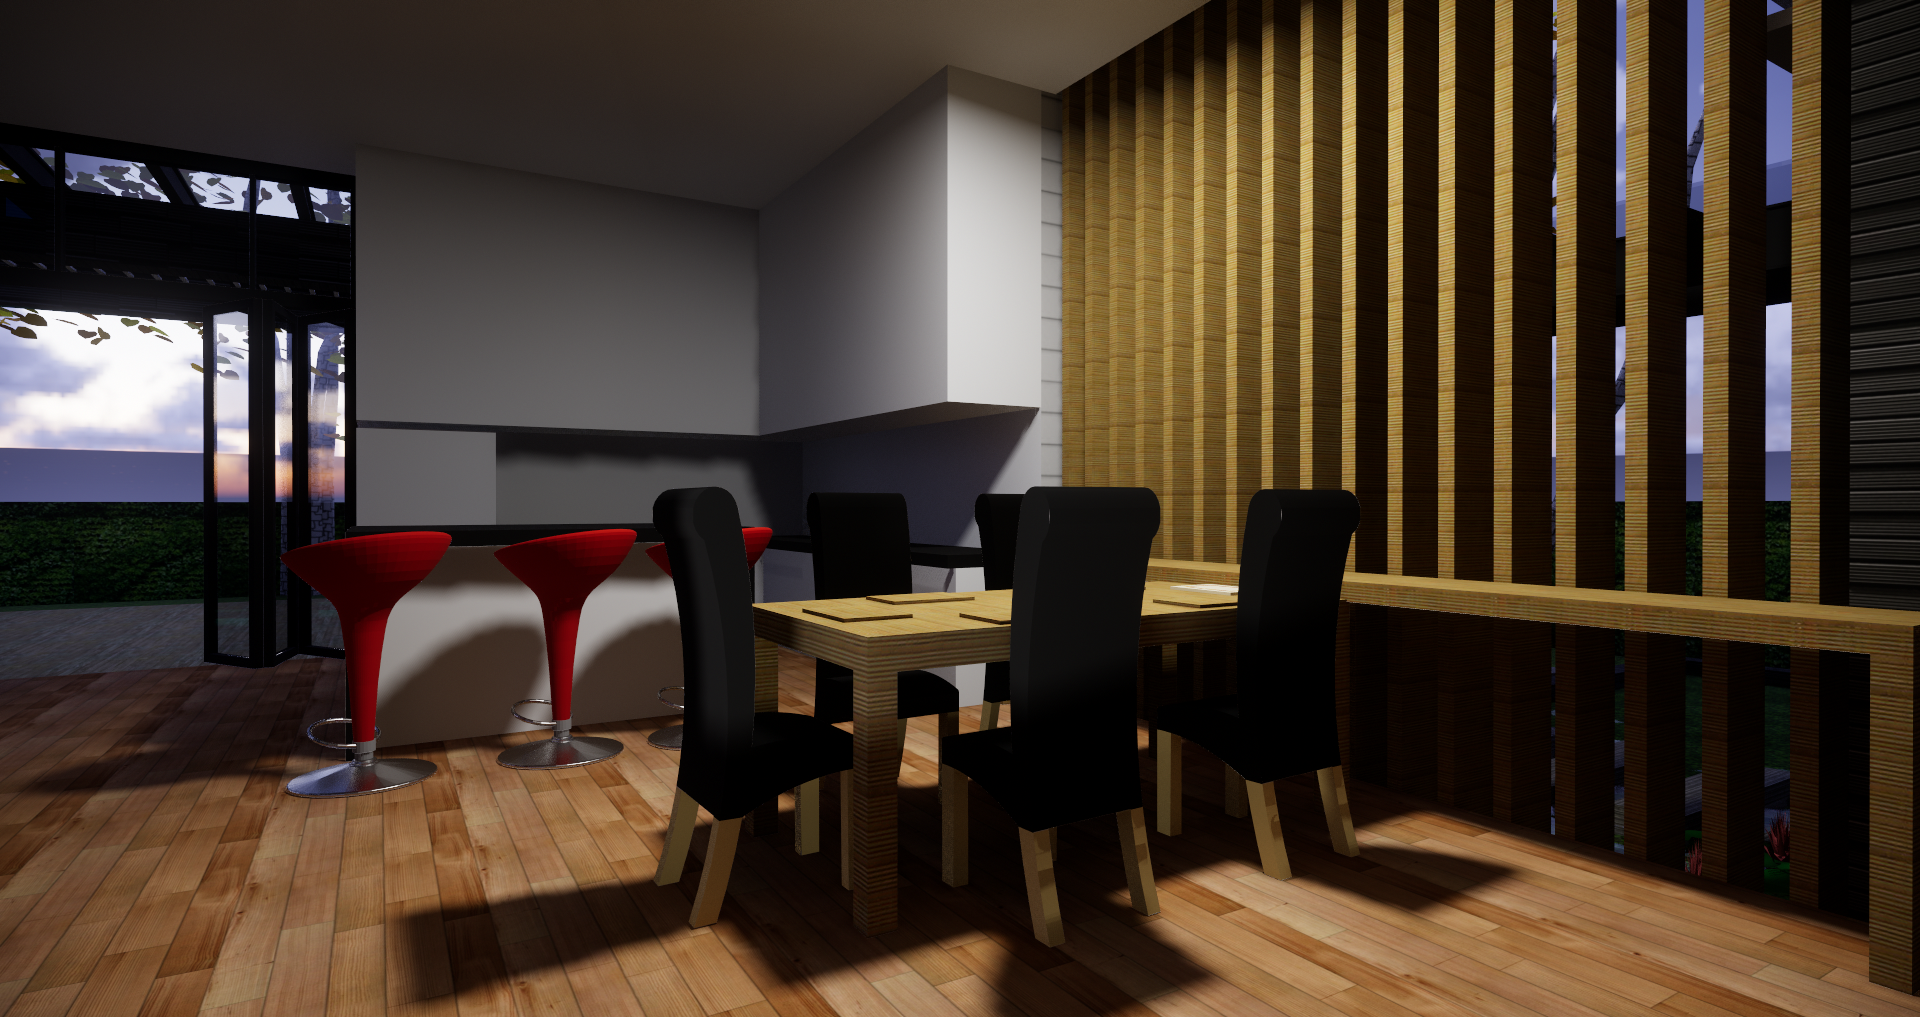
9. One rectangular area light illuminating a dining room
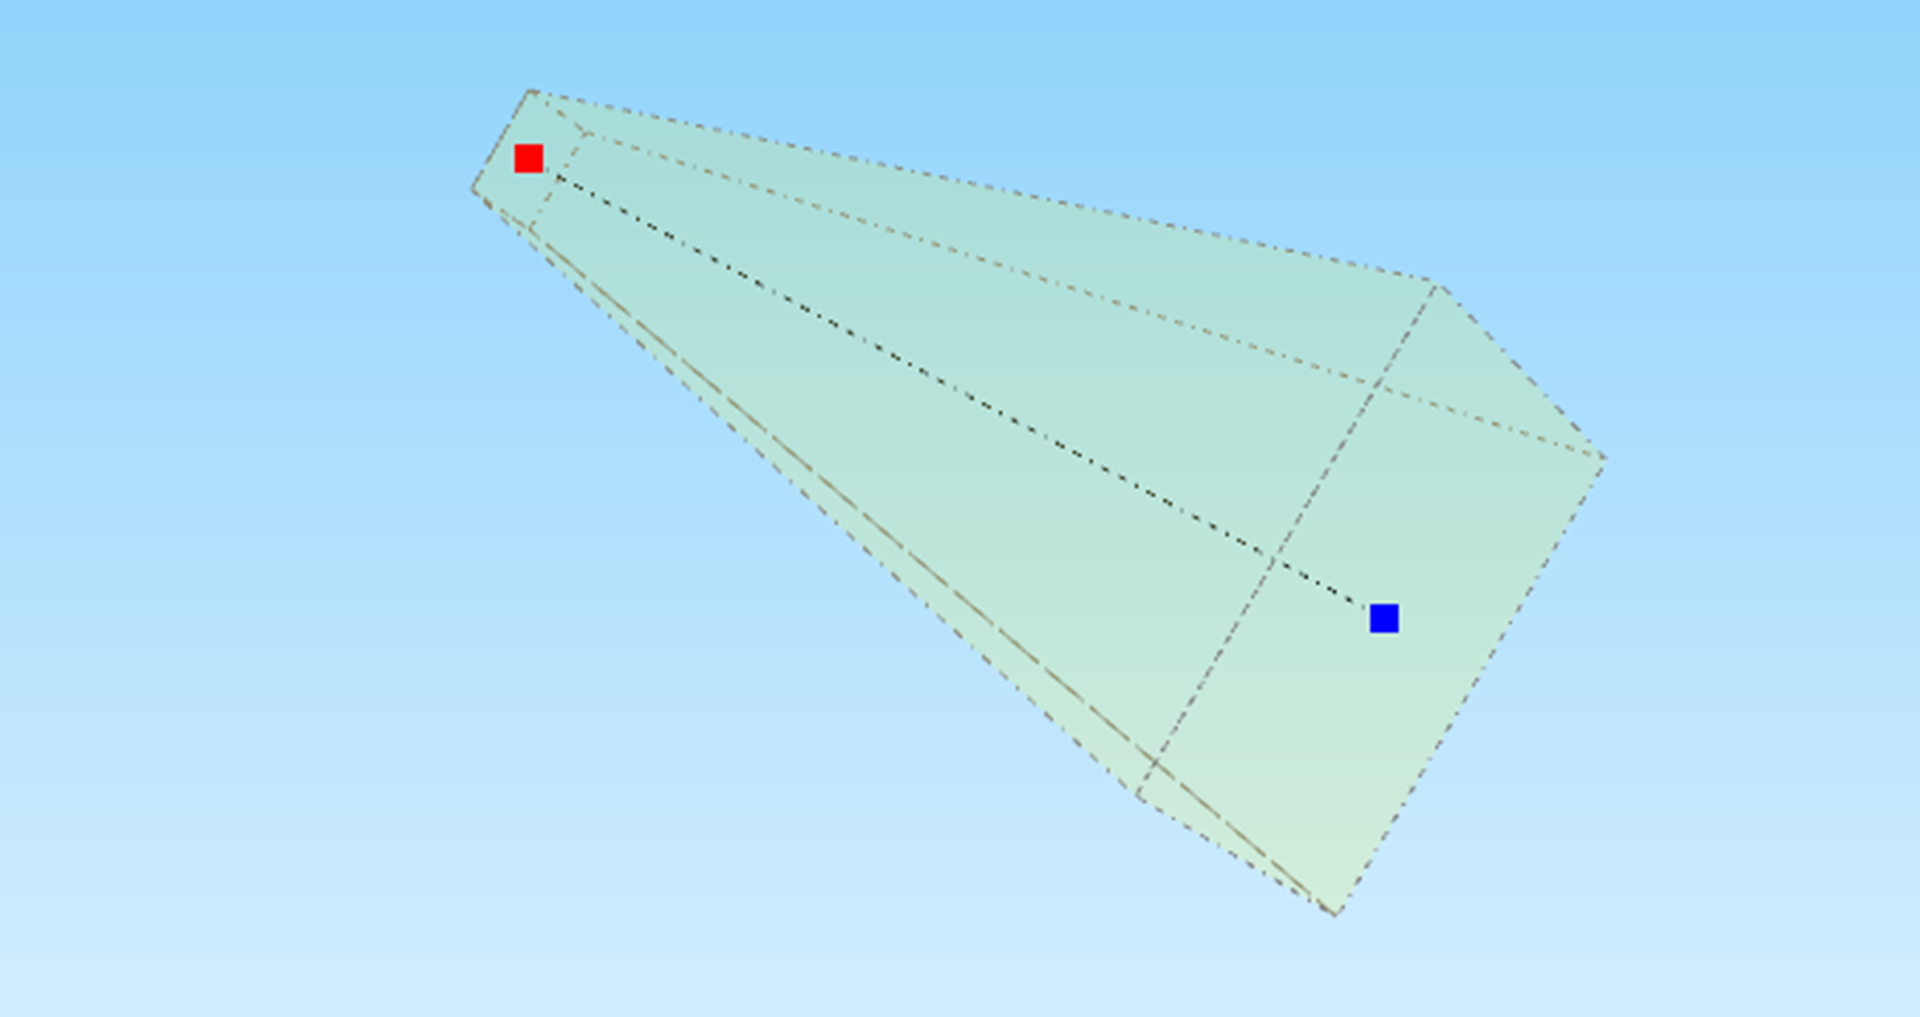
10. Light beam of a rectangular light
Because these two lights are so similar, I will mainly refer to the rectangular light in the below examples. The only difference between the two is the shape of the beam.
You can place the rectangular light using the same 2-Click system described above for spot lights. The beam, however, looks different from a spot light. Check it out below. As you can see below, both ends of the beam are rectangular, and the face from which the light emits covers a much bigger area than a spot light, which ends in a single point (Image 10).
Placing the rectangular light allows you to adjust three settings in the Enscape Objects window (Image 11). The first is Luminous Power, which controls the brightness and range of the light; it is measured in lumens. Additionally, you can define the Length and the Width of the light source in meters via the Objects window. The maximum size for a rectangular light is 3 meters by 3 meters.
After a light source has been placed, you can always return to editing it by simply double clicking on the geometry. When you do this, the light beam will be visible, as will various aids to help you adjust the size and direction of the beam. To exit this editing mode, simply press the ESC key. If you are in the middle of editing the position or size and realize you have made a mistake, the ESC key will cancel the edit and return the light source to its previous setting. You can also use the Undo and Redo functions in SketchUp, and any changes you make are immediately transferred to Enscape.
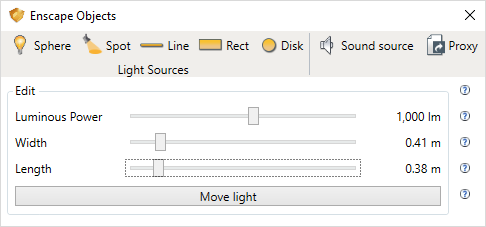
11. Rectangular light window
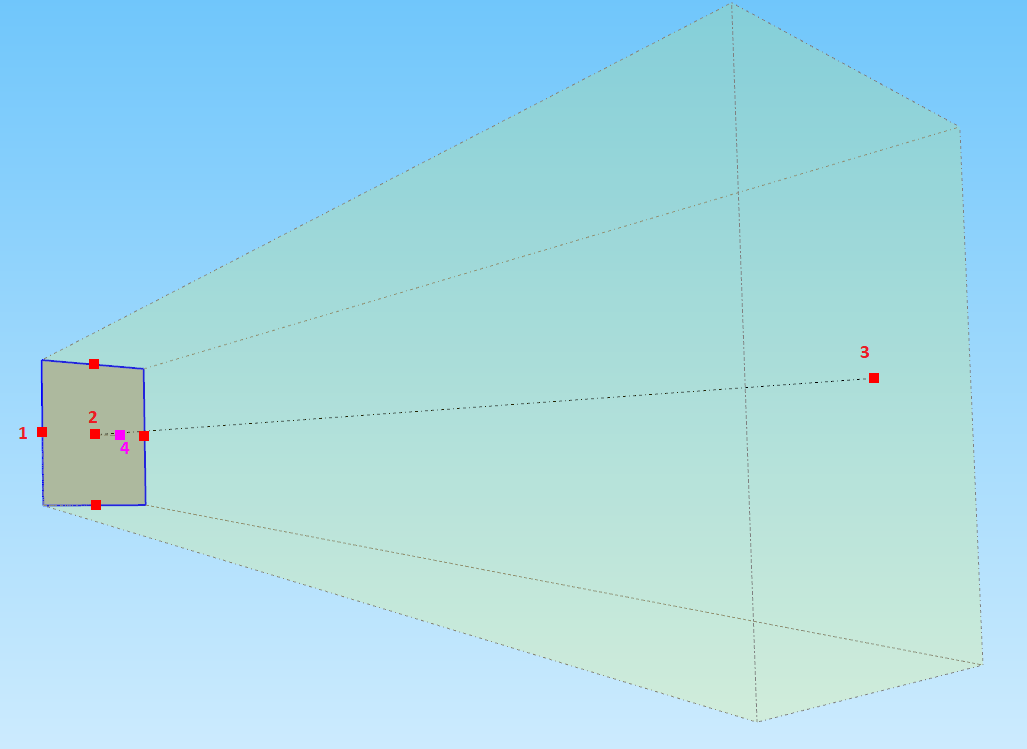
12. Editing a placed rectangular light
Let’s take a closer look at the controls you have in regards to editing your lights after placing them. Double clicking on the light will enable the edit mode (Image 12).
By clicking any of the red squares located along the edges of the rectangle (1), you are able to adjust the width or length of the area light, just like in the Enscape Objects window. The advantage of doing it by hand is that you have the ability to match the size of the light exactly to the light fixture you want to place it in, especially if you don’t know the measurement of the fixture in meters.
Clicking the middle red square (2) will allow you to move the face of the light source around, if you decide it should be placed a little differently. You can also move any of the lights by selecting it and clicking Move Light in the Enscape Objects window. You can adjust the angle of the beam by clicking the square at the end of it (3). Clicking the magenta square (4) will allow you to rotate the face of the light source.
You also have the option of using the native SketchUp tools to rotate or move your light source.
So what else can you use rectangular lights for, other than the practical uses of filling light fixtures? Obviously it is worthwhile to light your model meticulously, so that when you are showing it to a client, you are prepared for any eventuality. The client might want to see what the house looks like at night, and if you haven’t added lights, there won’t be anything to see.
But even with Enscape’s easy 2-Click system, it can take some dedicated time to light a model, especially if it is very large. Area lights are perfect if you want to take a quick screenshot of your model at night, but don’t have the time to add too many lights.
Take a look at our model below (Image 13). It currently only has the lights we added on the roof and in the living room. It’s pretty hard to see anything at all.
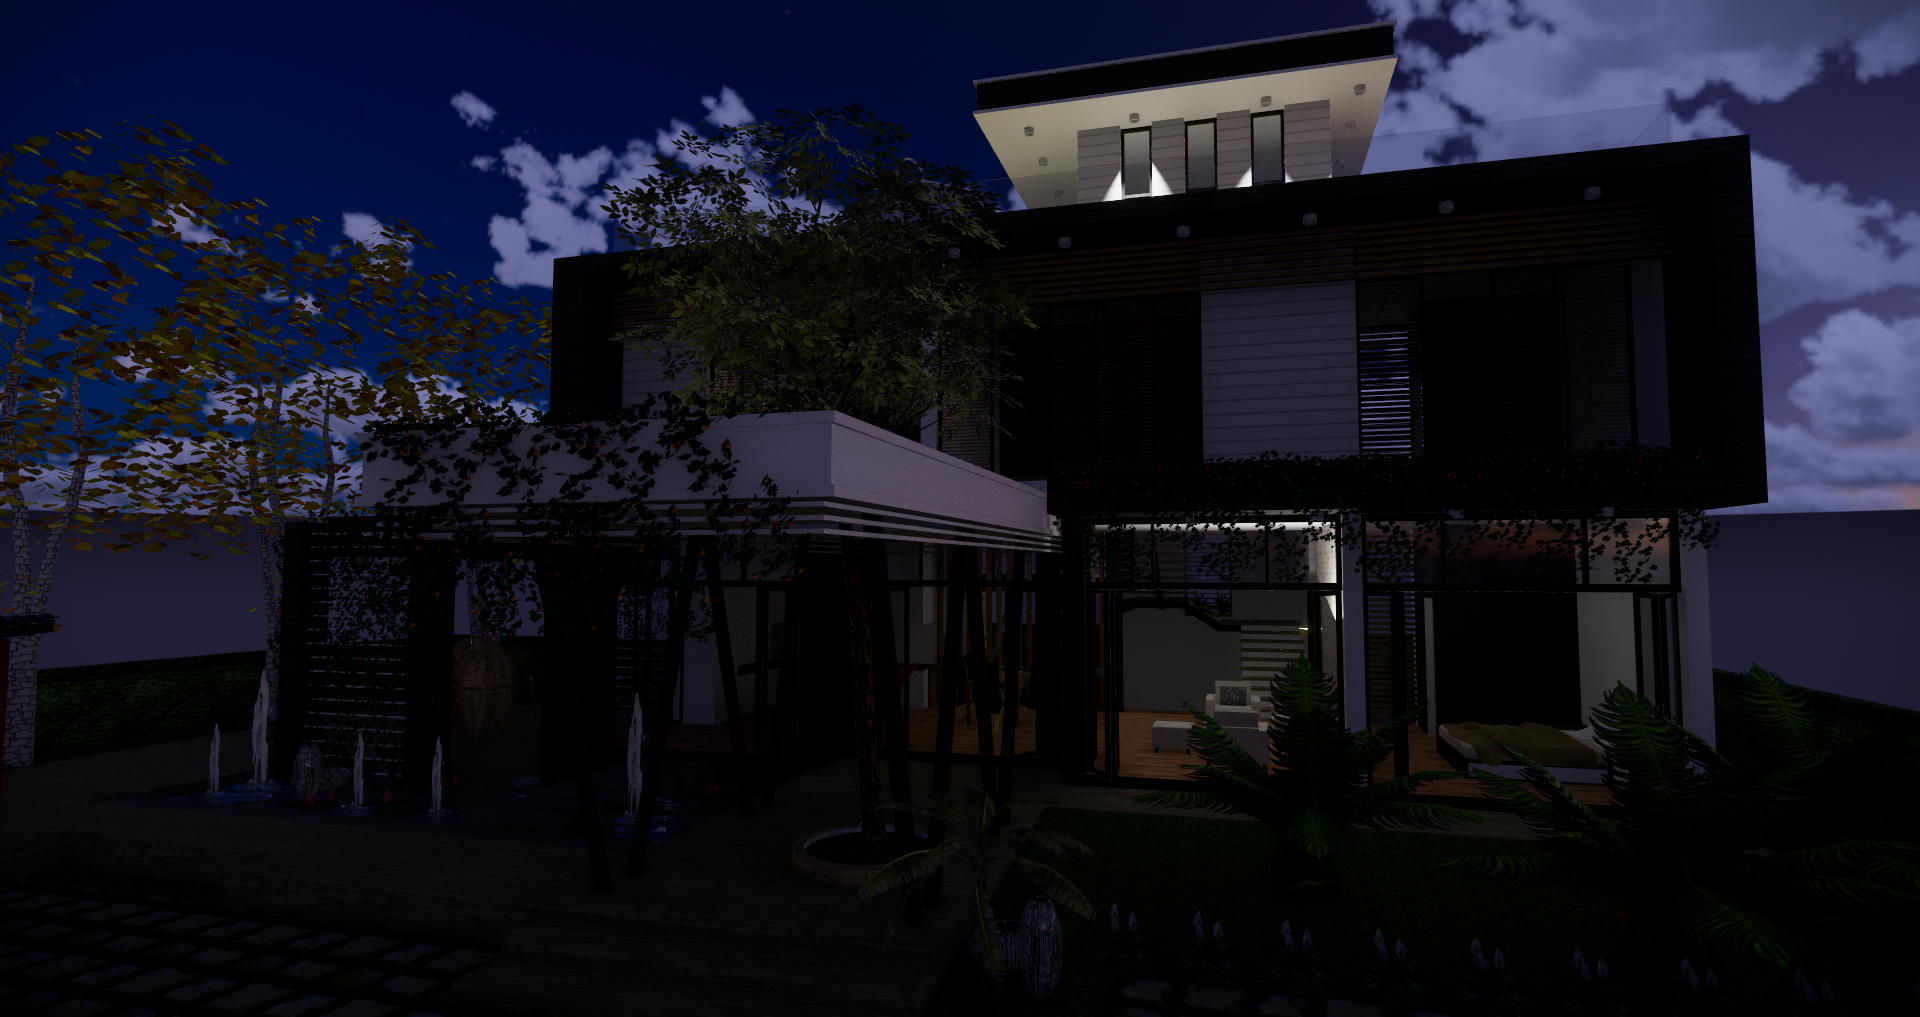
13. Exterior view at night
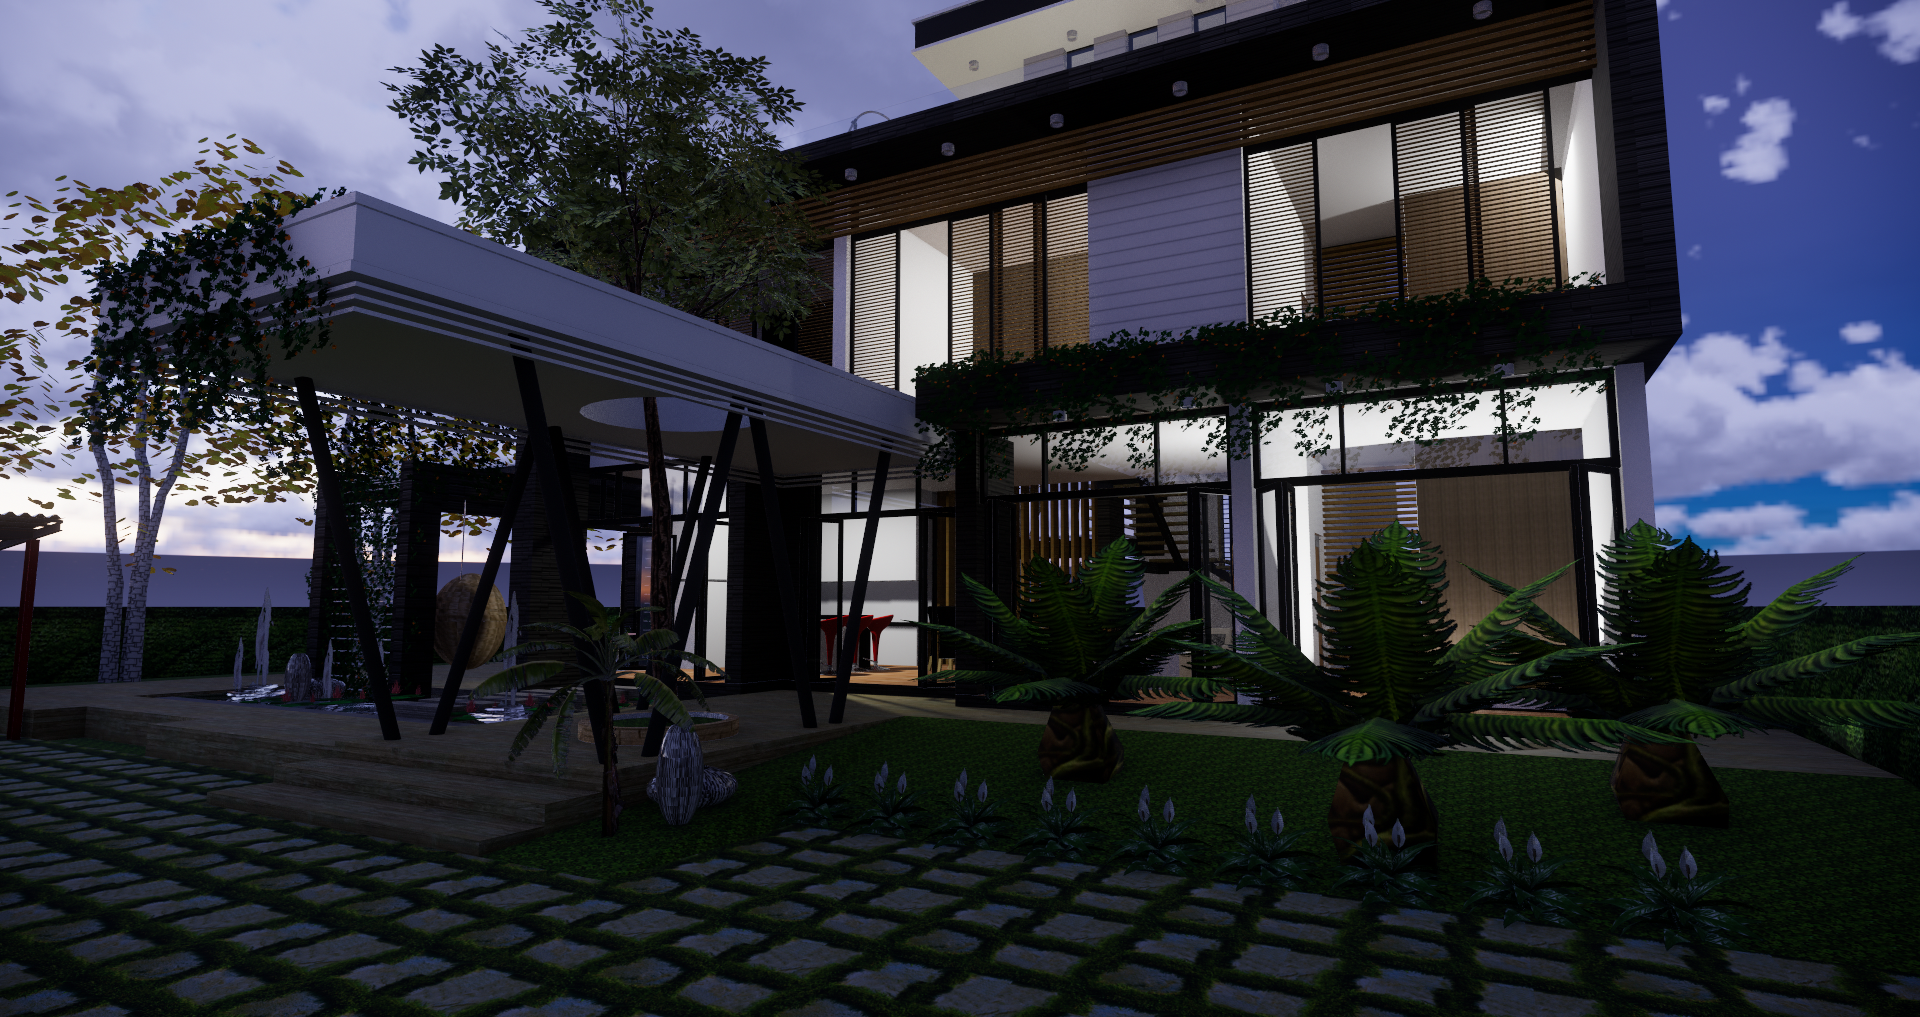
14. Exterior view at night with four area lights
Now take a look at this second screenshot (Image 14). In this one, I have added four rectangular lights, one each in the bedrooms and kitchen. Looks a lot better, right? And it took no time at all to get this image ready to screenshot.
What if you want to turn your lights off? While this is probably not necessary in most cases, there are a couple of different tricks to turn your lights off. Perhaps you want to take a screenshot that emphasizes one particular room, but you obviously don’t want to undo all of your hard work. If you want to turn all of the light sources off, you can set the Light Brightness in the Advanced tab of your Enscape Settings to 0%. If you want to turn of individual lights, you can do this by hiding the geometry or the assigned layer.
Linear Light
The fourth light in Enscape’s arsenal is the linear light. It resembles a fluorescent tube in shape and can only be scaled in length, which can be adjusted in the Enscape Objects window or by editing the source itself (Image 15 and 16). Again, you can also set the luminous intensity of a linear light.
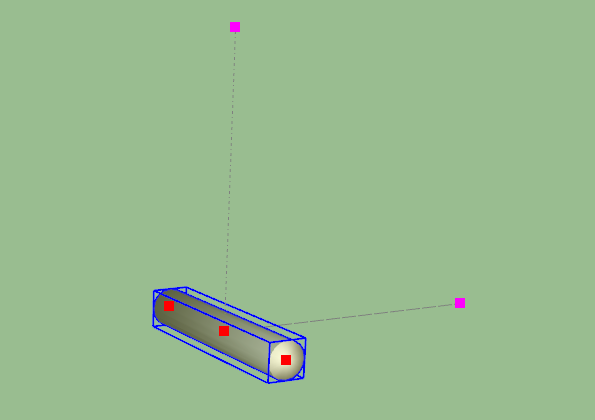
15. Geometry of a linear light
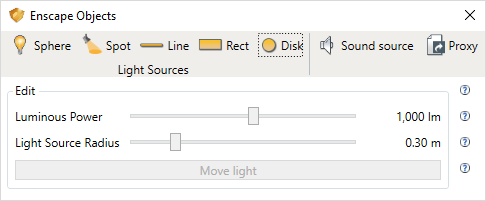
16. Adjustable settings for a linear light
The linear light can be placed with two clicks, like the sphere light. After you place it initially, you can define the length and rotate it to fit the scene. The placement of your linear light will affect where the light shines: the shadows along the length are soft, while the shadows on each end of the light are somewhat more focused. Below I have placed a linear light in our SketchUp model to show you what I mean (Image 17 and 18). Most of the light is emitted along the length, rather than from the ends of the light.
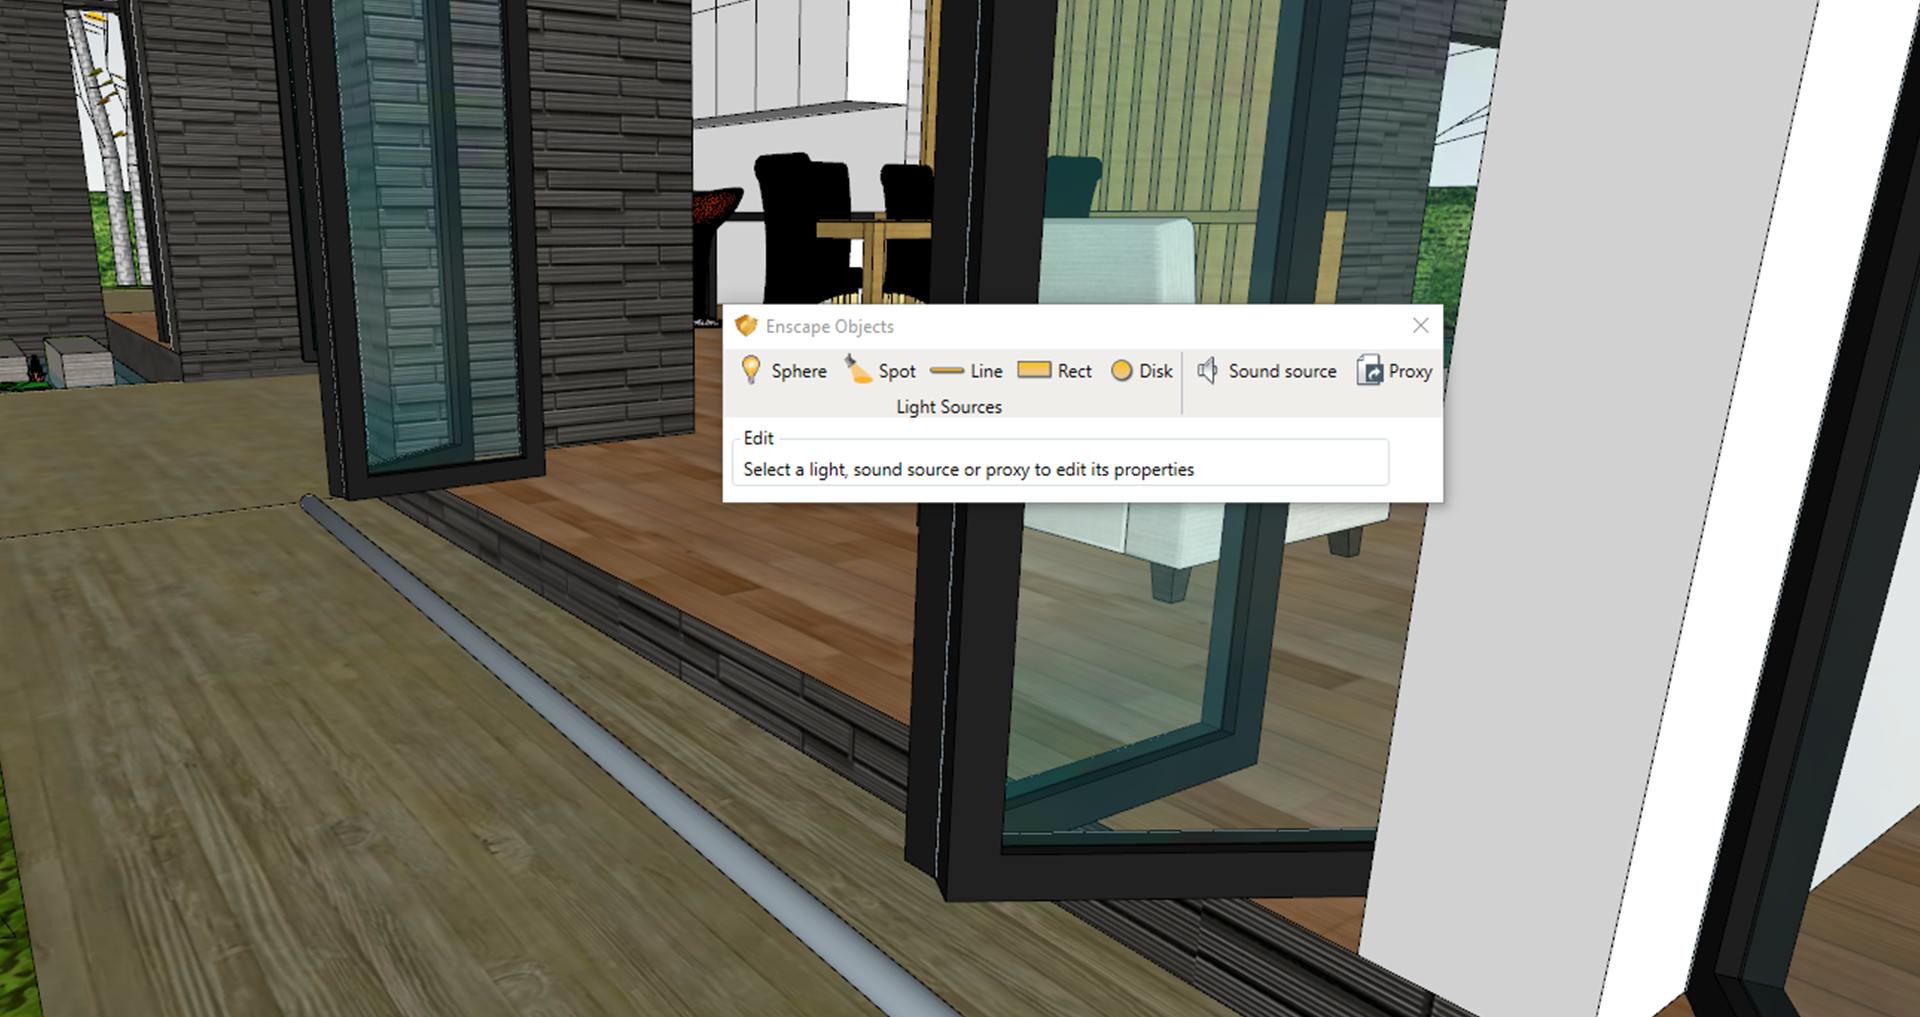
17. A long linear light
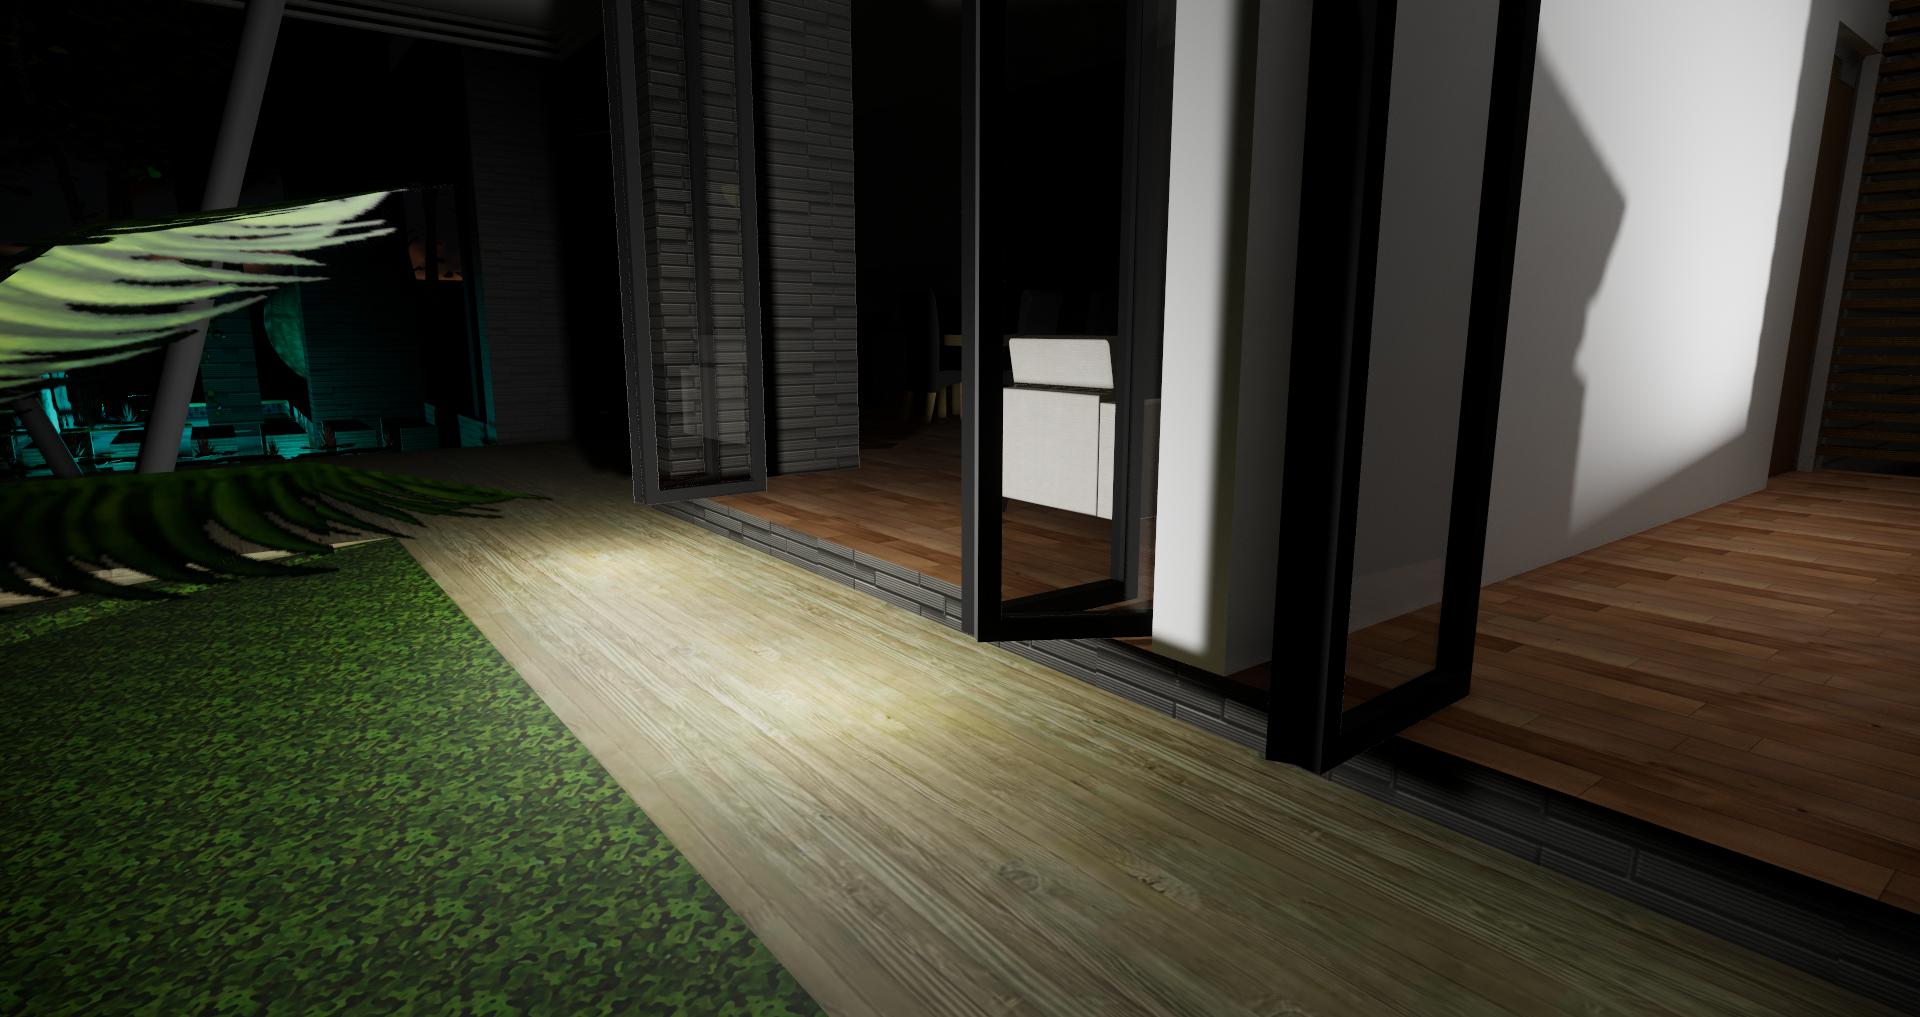
18. Light emitted by a linear light
You can now color any of your lights in SketchUp by using the paint bucket tool. Simply select the paint bucket tool, choose your color in the Materials tray, and click on the light to color it. This also works if you paint a component or group that contains a light source. The possibilities with this are endless!
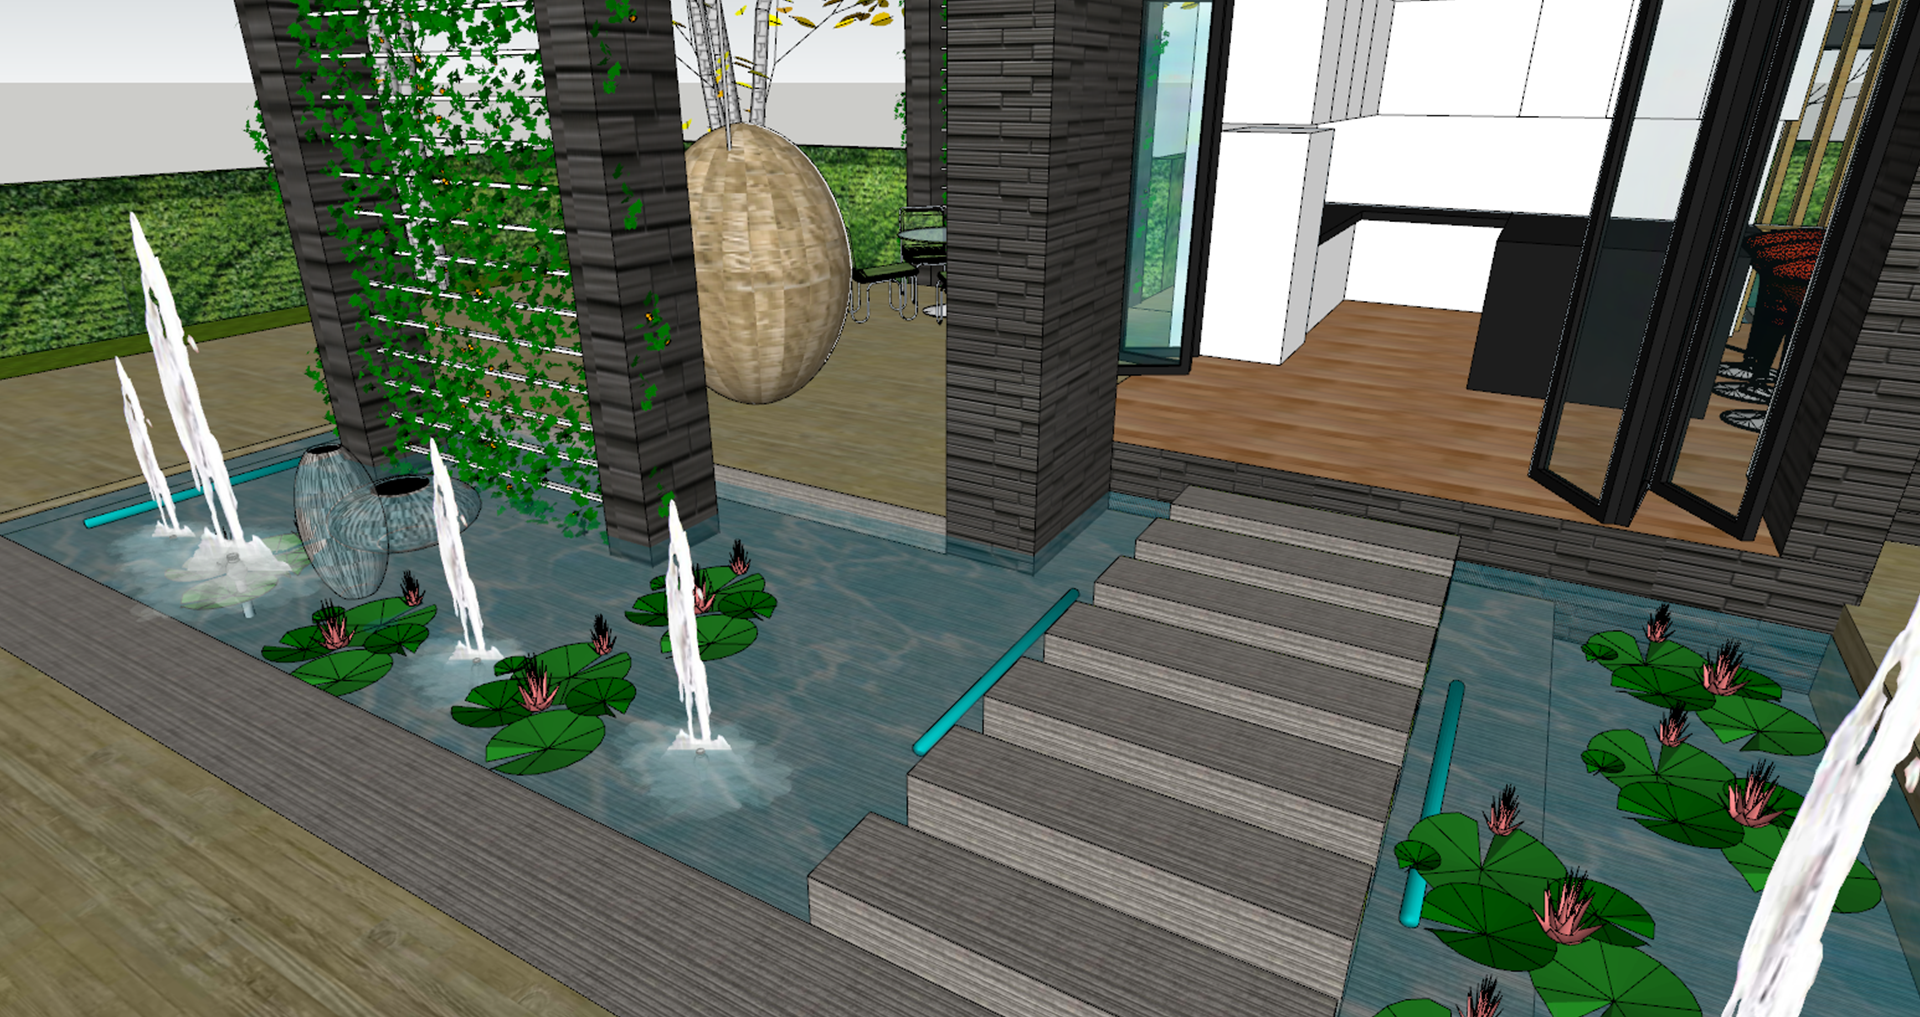
19. Colored linear lights in SketchUp
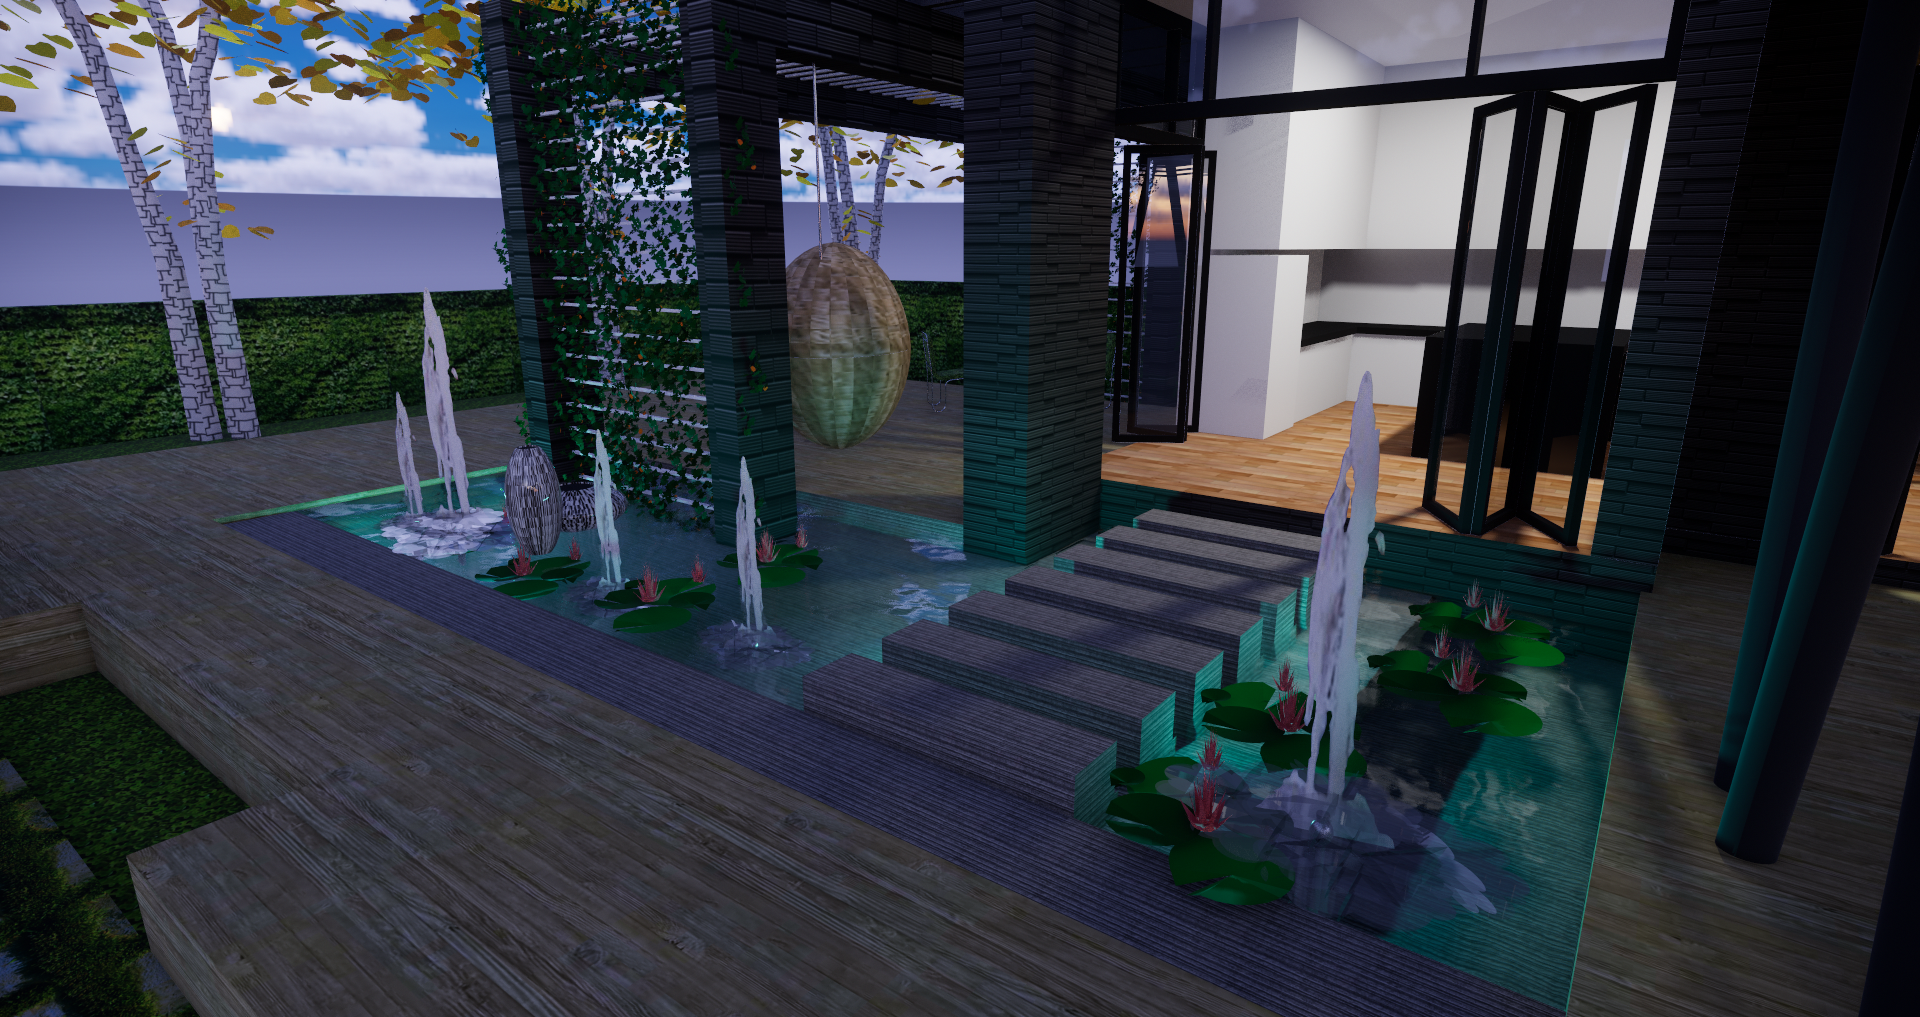
20. Rendered view of Image 19
Here I’ve added some linear lights to the pond in our model for a glowing effect (Image 19 and 20). You can use this feature to achieve a more decorative effect, like the one above, but also to add realism to your model. If you are trying to match your 3D model to a real-life lighting concept, you can use the paint bucket tool to mimic the crisp white of an LED lamp, or the yellowish glow of an incandescent bulb.
Depending on what you effect you are trying to achieve with your lighting, you might find that emissive materials suit your purpose better. This is a completely different approach than placing light sources. While you can always make a material emissive by adding the keyword “emissive” to the material name, a more effective way is through the Enscape Materials Editor. Simply select your material in SketchUp and open the Material Editor through the Enscape ribbon.
You can then check the box next to Self-Illumination to make the material emissive. Use the Luminance slider to adjust the emission intensity; the maximum intensity is 100,000 candelas. You can also assign a color to the material.
Check back to the blog soon to see a dedicated blog post on emissive materials!
However, do not forget to check out this wonderful Video from The Rendering Essentials about Interior Lighting and Colored Lighting:
Conclusion
You can implement and combine the Enscape lights I have presented in limitless ways to take your model to the next level. Whether you are shooting for extreme realism or dramatic scenes, light is one of the easiest ways to achieve your goal. Place a few, quick sources to light up the rooms in your model for a screenshot. Or, take the time to develop dedicated lighting for each room; this will wow your client during a walk-through presentation. Your models are already stunning by themselves, but adding lights elevates the experience for the viewer.
The best part is that integrating lighting into your workflow doesn’t have to be complicated, if you follow the tips you have learned in this post. In fact, you probably knew how to do all of these things already, before reading the post. Now just apply that to your Enscape lights! Place your lights just in front of your geometry with the quick 2-Click system. Duplicate identical lights quickly by copying and pasting them. Double click a light to edit it immediately, and use the ESC key to abandon changes if you make a mistake. If you prefer, you can use the native SketchUp tools to rotate or move your lights. And, don’t forget to add some color with the paint bucket tool!
However, don’t take my word for it: to test out Enscape lights yourself, just download our 14 day free trial here. I’m sure you will find it enlightening!