Best Practices for Emissive Materials in SketchUp
You may have seen my recent post about artificial light sources in SketchUp , in which I covered different techniques to realistically light your model. But there is another way of creating light in your projects: emissive materials. These self-illuminated materials emit light, but differently than artificial light sources, and can be used to create effects that you can’t achieve with artificial lights.
Making your material emissive turns it into a glowing light source, which you can assign to any shape and even add a texture to. This means you can be incredibly creative with emissive materials. They are often used on objects where some part should appear to glow, such as a television or computer screen, the brake lights of a car, or an exit sign. But you can also use them to create light in areas of your model where it might be impractical to use artificial lights: to create the effect of recessed ceiling lighting, for example.
It can be difficult to differentiate when to use emissive materials versus artificial lights; both have their benefits and drawbacks. Understanding when to use which type of light can take your project to the next level in terms of realism. In this post you’ll learn all about emissive materials, how to apply and adjust them using Enscape’s Material Editor in SketchUp, and their many different uses. This post show examples from SketchUp, but you can of course work with emissive materials in Revit, Rhino and ArchiCAD as well!
What Is an Emissive Material?
Emissive materials are self-illuminated materials, that is, materials that emit light across their surface. When an emissive material is used in a scene, it is rendered as a visible light source, and depending on the intensity you set, its glow can actually light up the surrounding area. The great advantage of emissive materials is that you can use them to create complex forms that glow; you can get really creative! Check out the picture below; I just created some shapes in SketchUp, and made the generic white material assigned to them emissive.
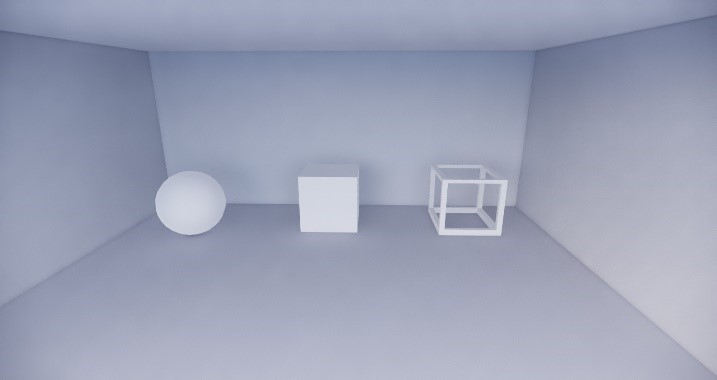
White material applied to simple geometry
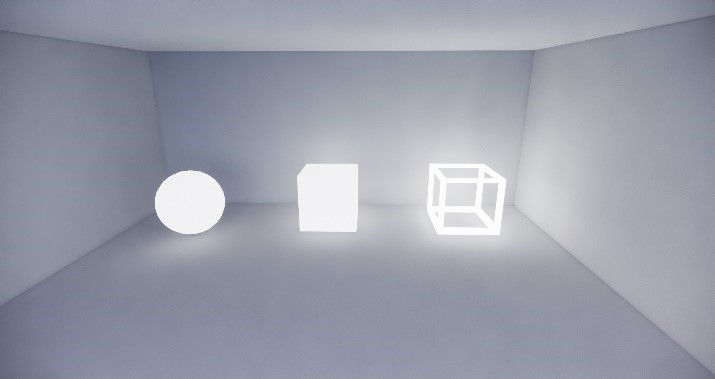
The effect created by making the material emissive
Emissive materials belong to the global illumination calculation. Global illumination (GI) is an important element in the rendering of realistic scenes. When light hits a surface, it does not simply end there, but bounces. With GI, these bounces result in an indirect light, which illuminates areas of your project that may not have artificial light or direct access to sunlight, like a long hallway or the corners of a room. Emissive materials are part of this GI calculation, meaning they emit indirect light. You won’t be able to use them to simulate a spotlight, but you can recreate the glow of a television screen, for example.
Let’s take a look at how you make a material emissive in SketchUp; with Enscape’s Material Editor, it just takes two clicks! First, open the Material Editor by clicking on the button in the Enscape ribbon, or by selecting Enscape Materials in the Enscape dropdown menu. Then use the native SketchUp pickup tool to select the material you would like to make emissive. This will allow you to adjust various settings relating to the material; to make it emissive, just check the box next to Self Illumination.
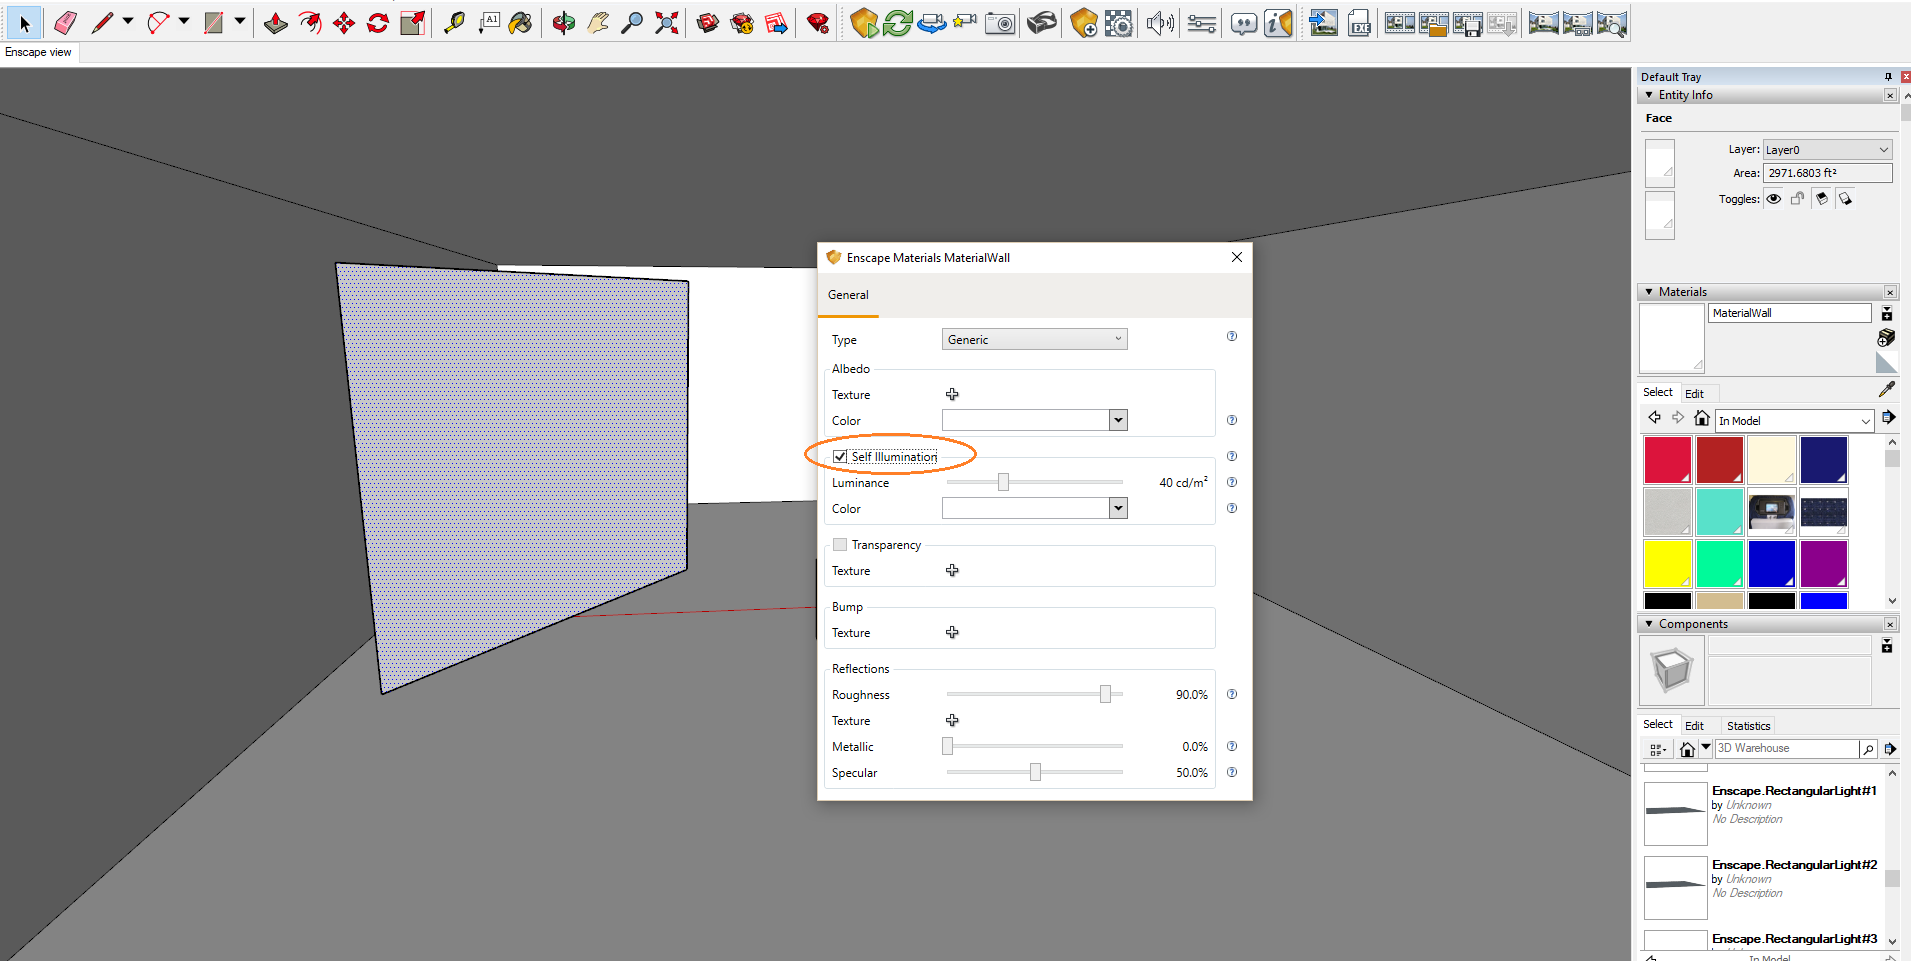
Check the Self Illumination box to make your material emissive
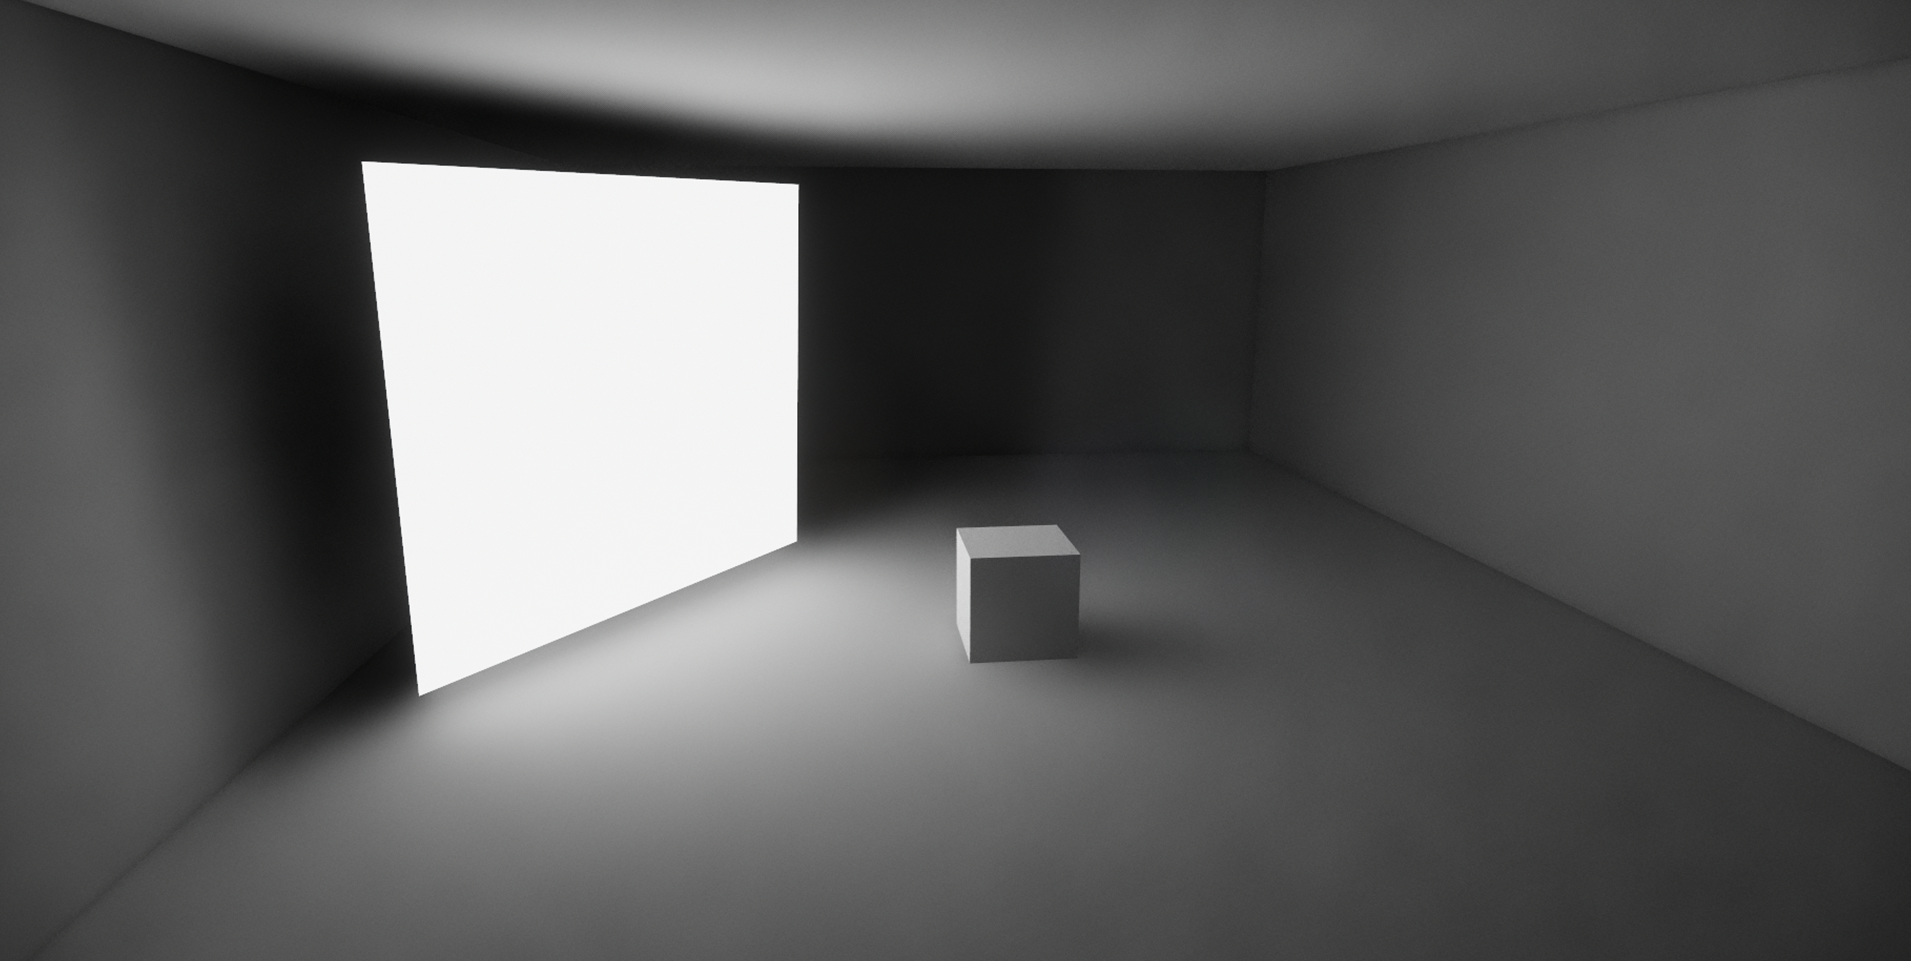
An emissive surface emitting white light and creating shadows
As you can see, the material surface emits a very bright light, which casts softer shadows. Emissive materials have one bounce less than artificial lights, which results in the light not being able to bounce around many corners. To change the brightness of the material, adjust the Luminance slider.
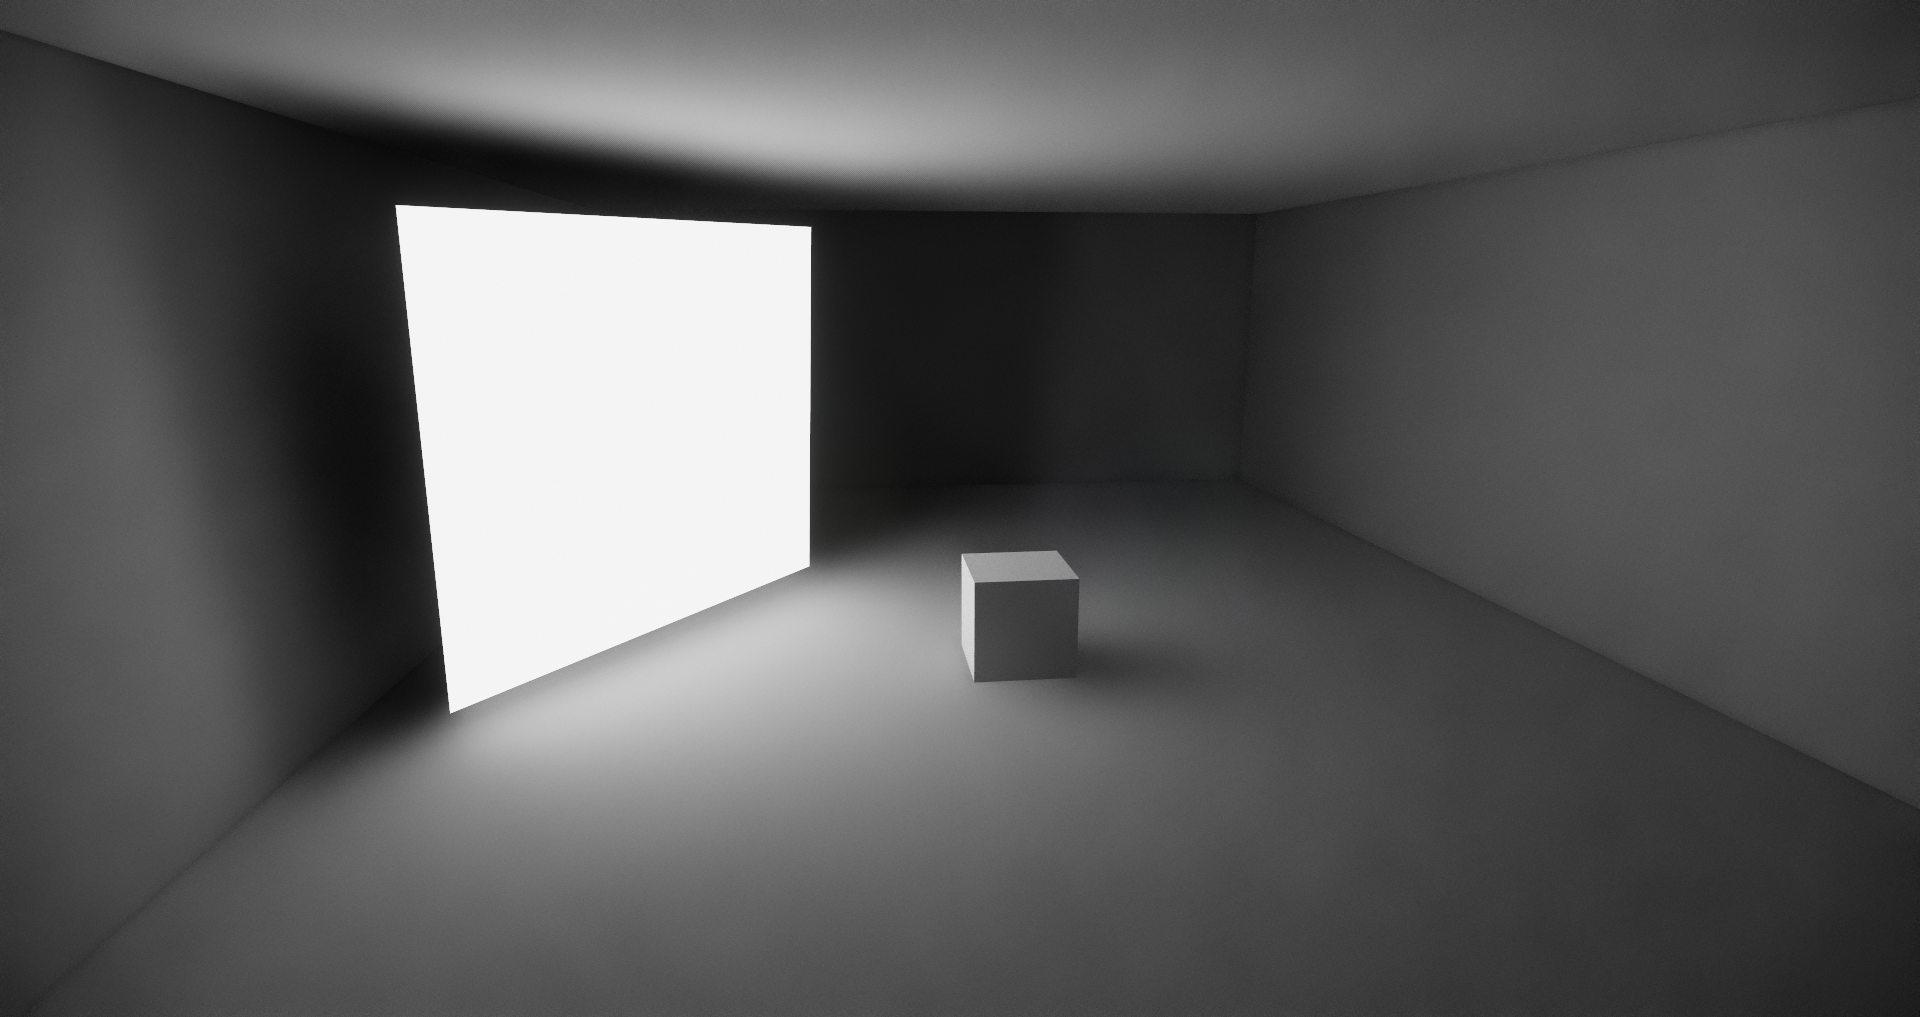
An emissive material contributing to the bounced light in the room
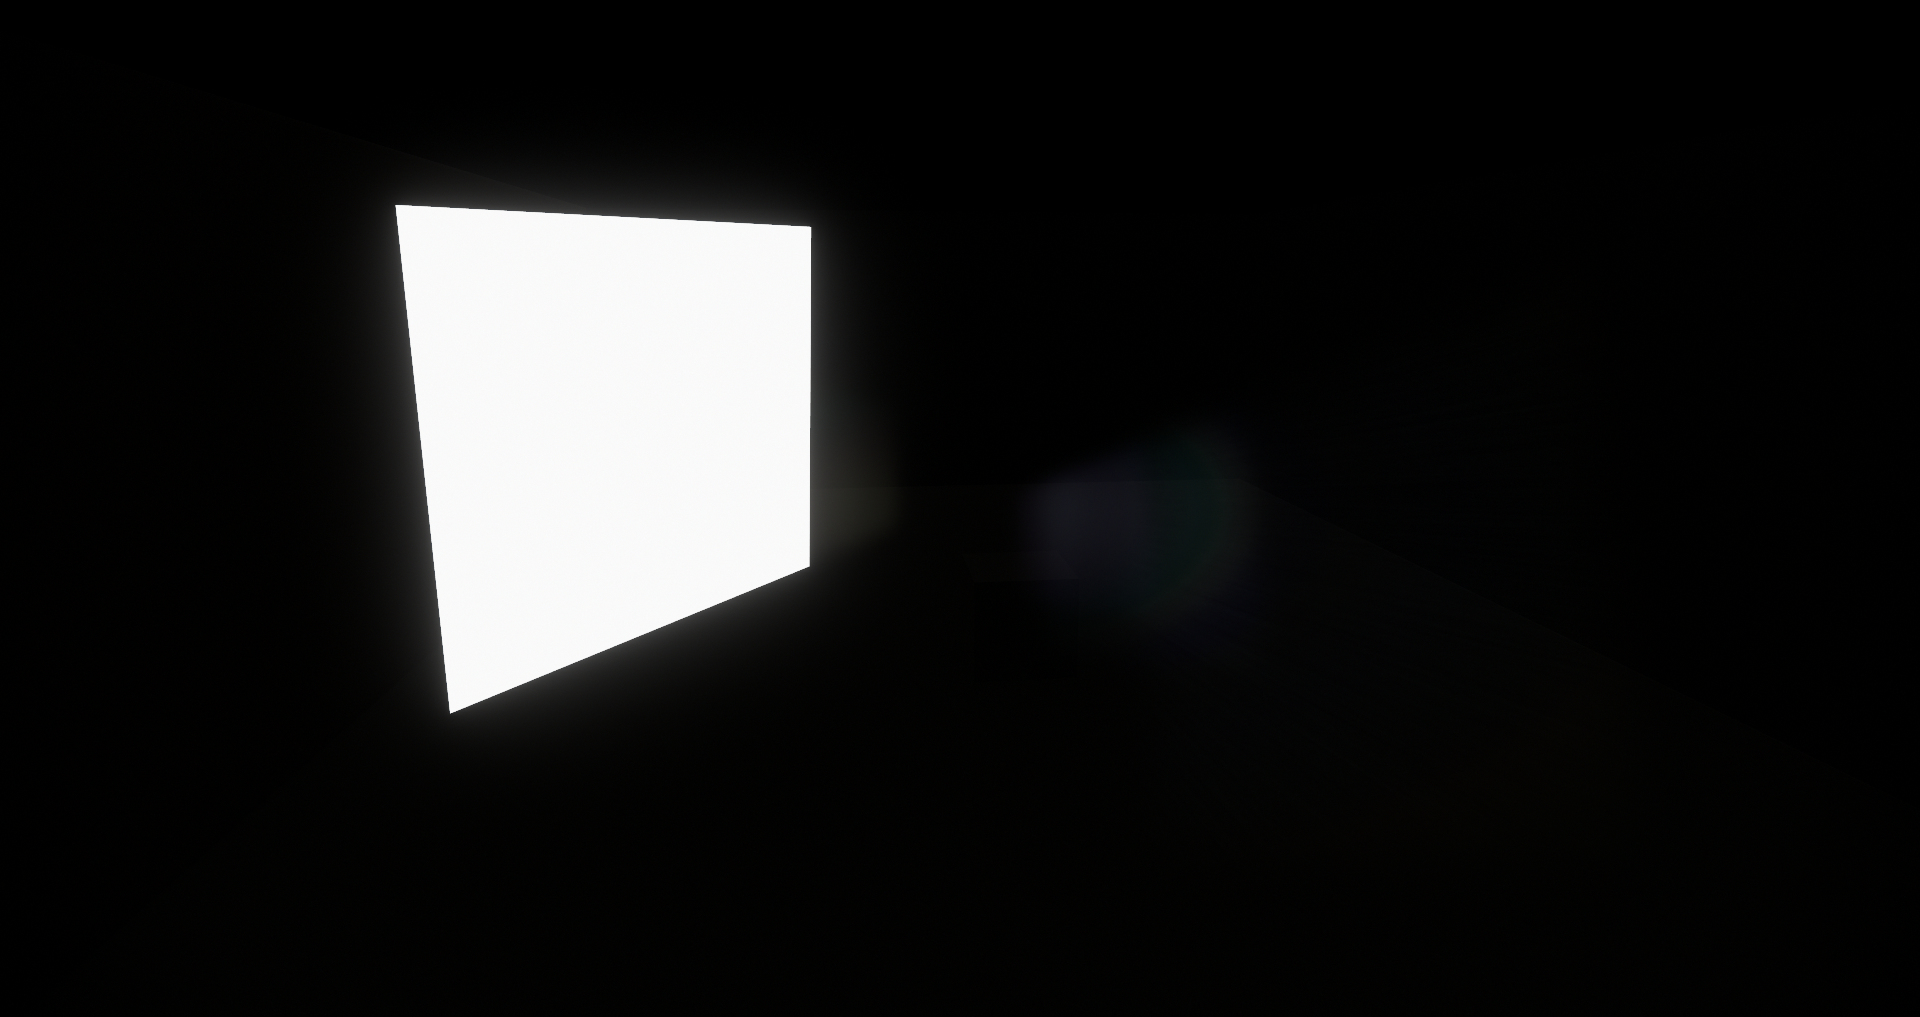
The same emissive material in draft mode
What makes emissive materials so versatile is that you can illuminate both colors and textures. To apply a color to your emissive material, simply select a color from the drop down menu in the Enscape Materials Editor.
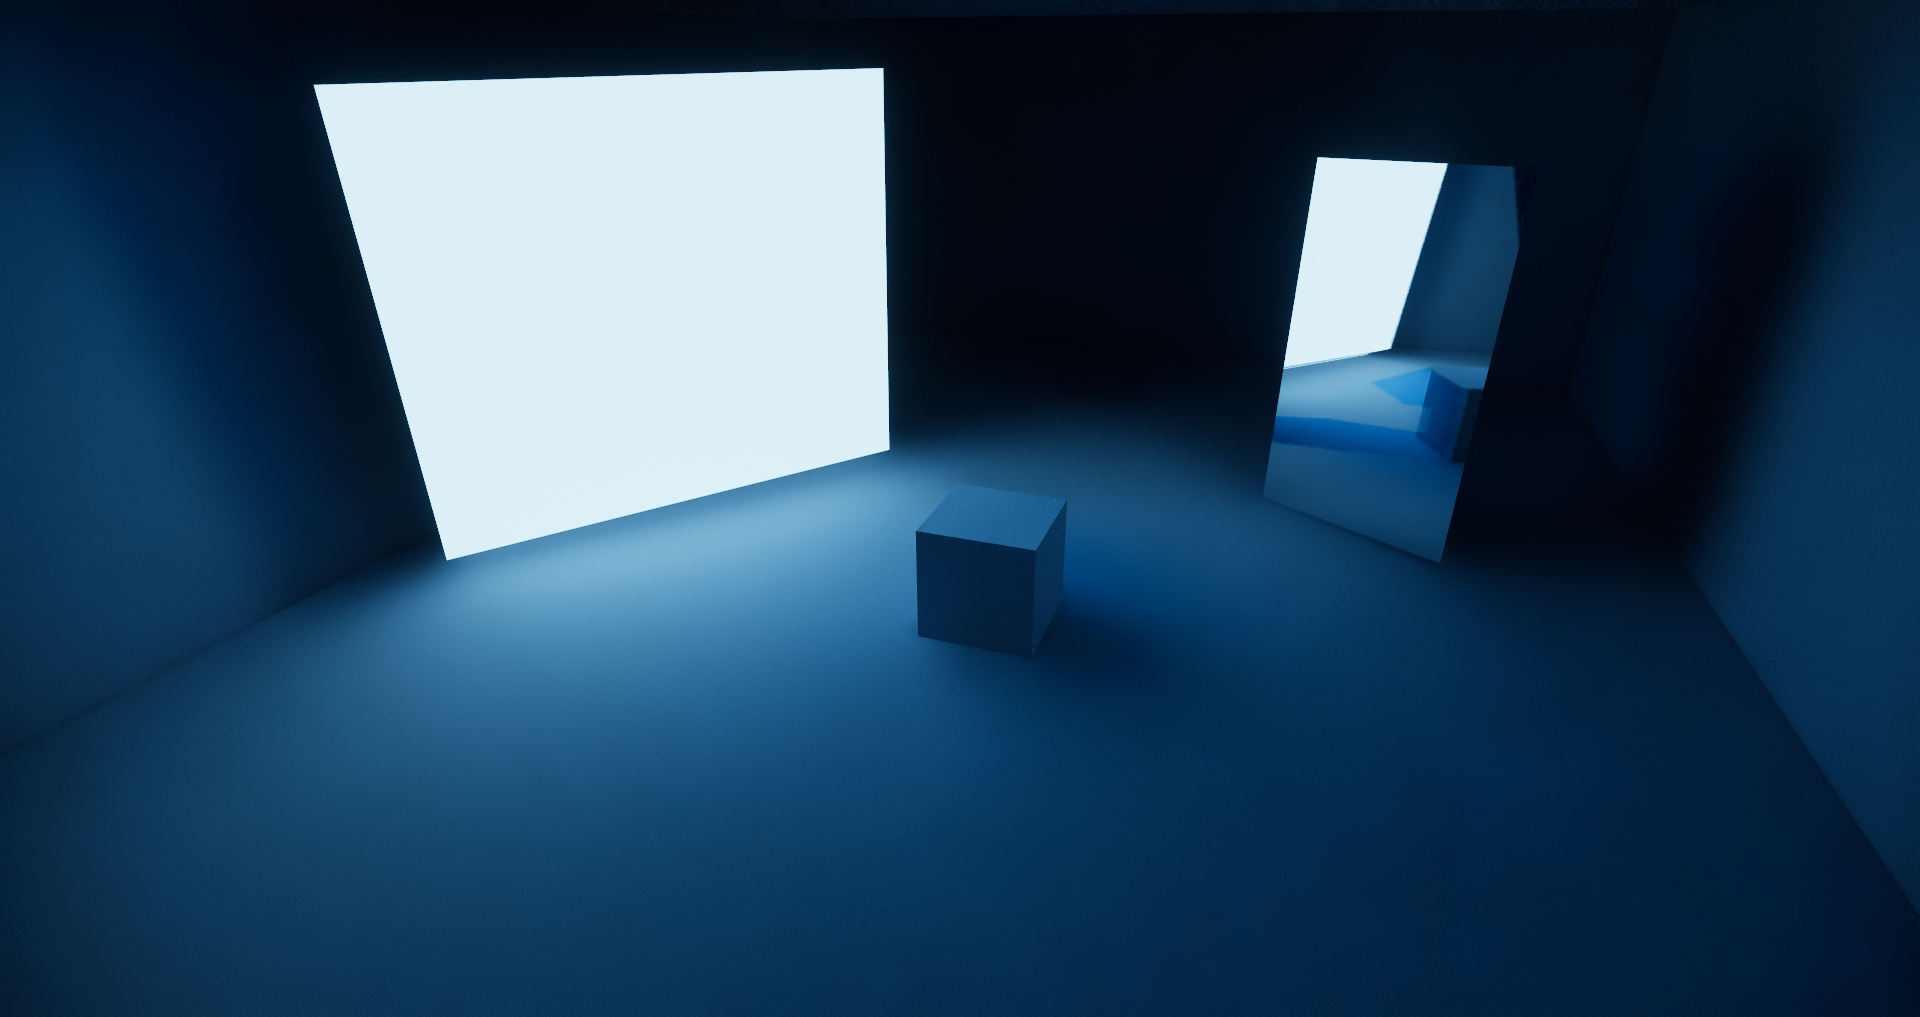
Emissive surface emitting a blue color
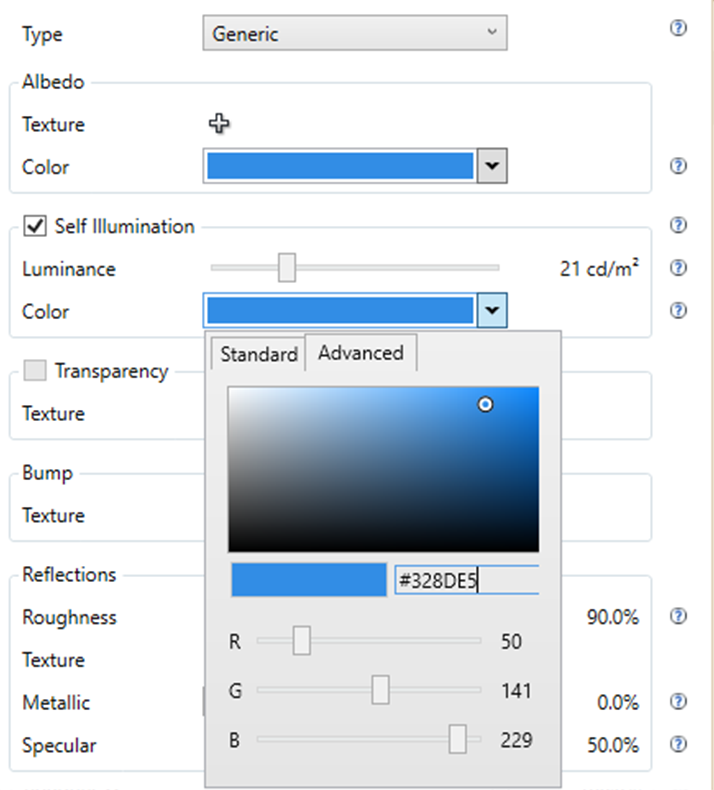
Match you color values for identical colors
Now check out what it looks like if you apply texture. For this example I have applied a wood floor as my texture, to emphasize the effect. It’s up to you whether to match the color of the light emitted to the color of the material itself. The generic white light that is emitted will still be slightly tinted to the color of the texture. If you would like the effect to be more intense, you can adjust the color of the light emitted, as I have done below.
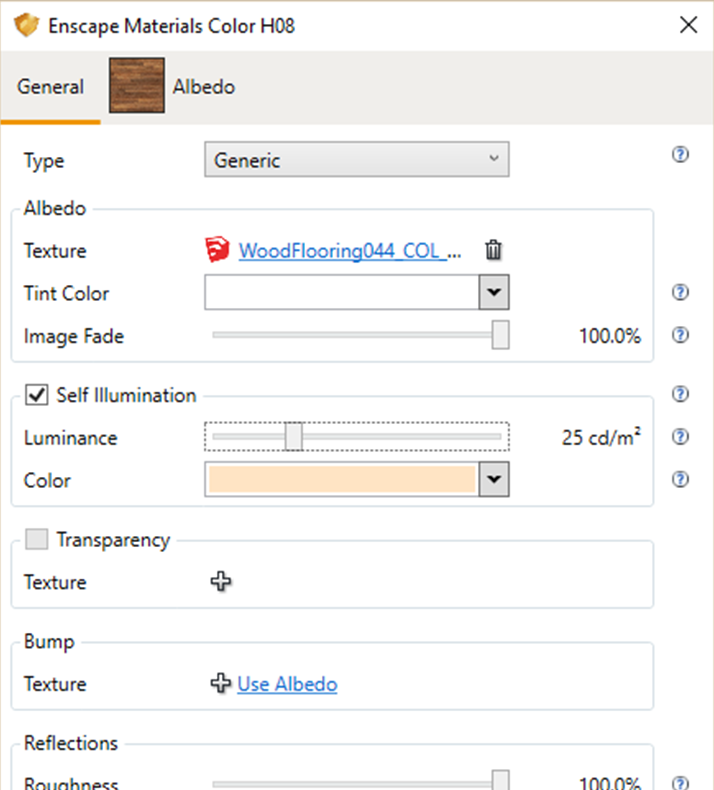
Apply a texture and match the color
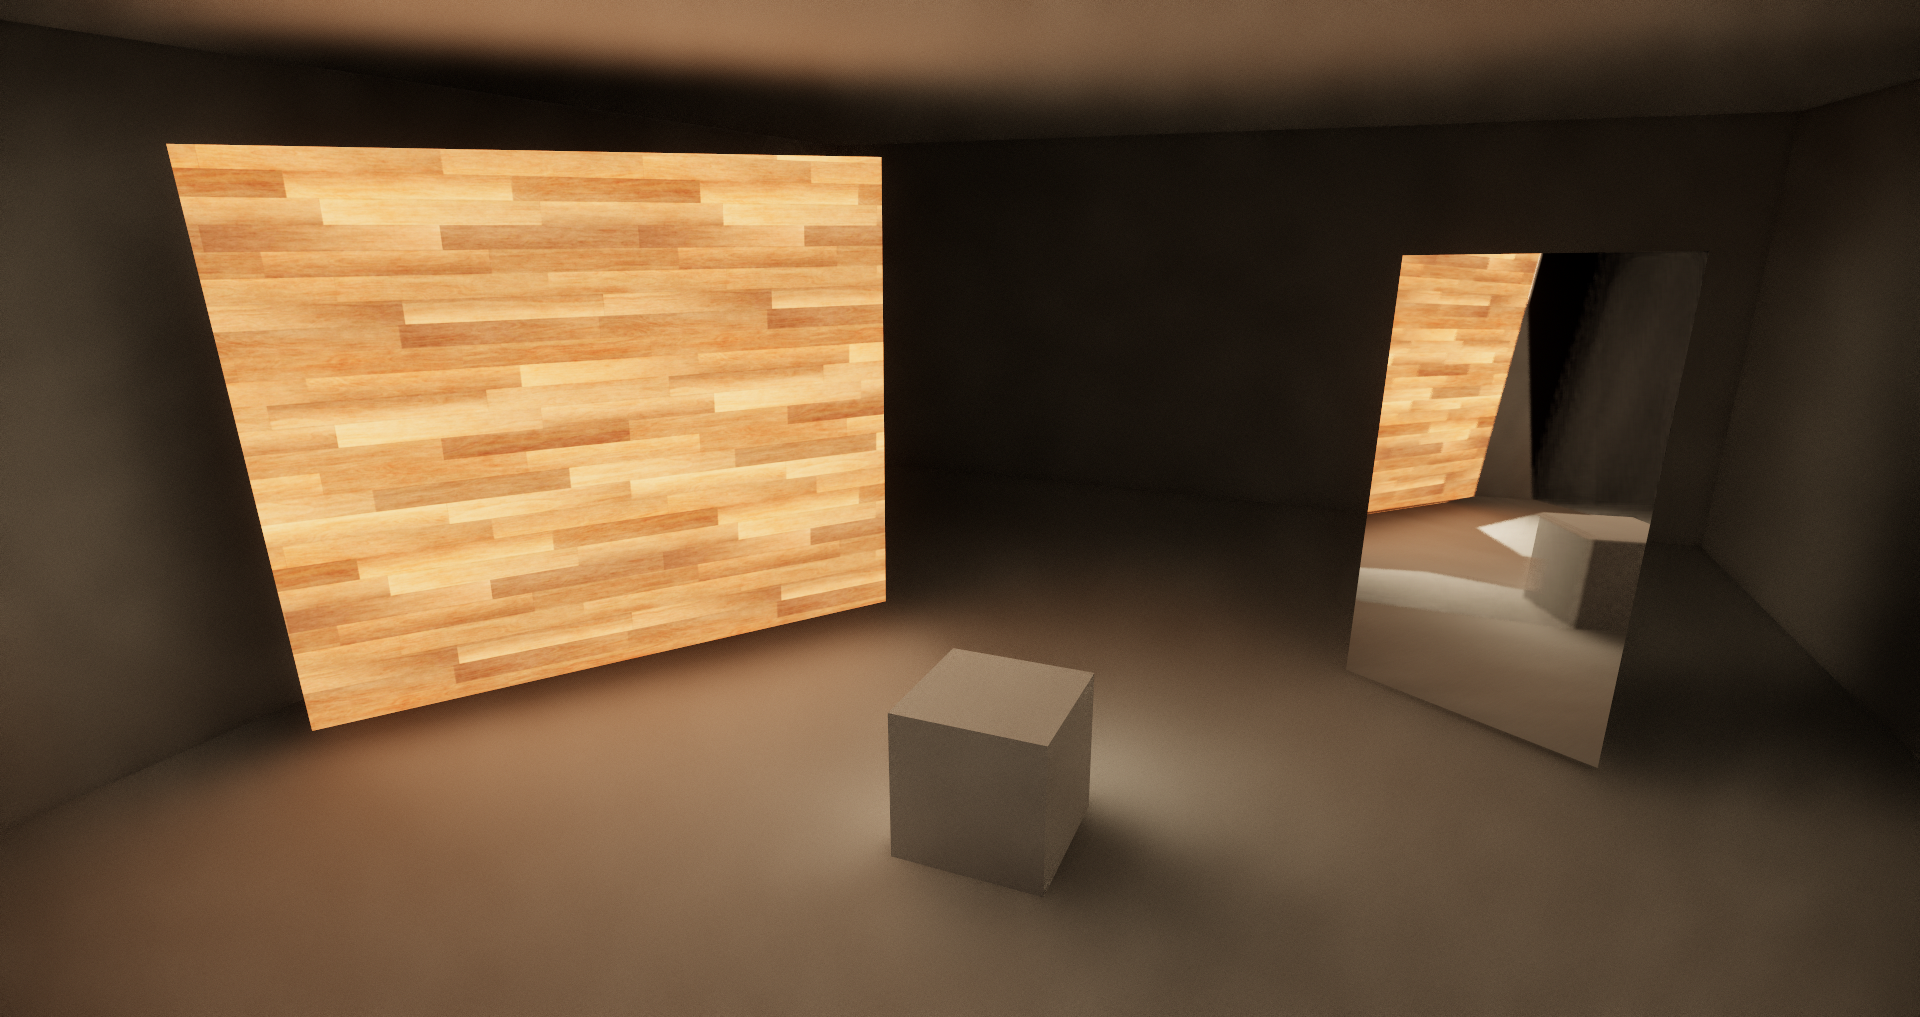
The texture applied to an emissive material with also glow
Emissive materials do have certain drawbacks. Occasionally, if the geometry you applied an emissive material to is not visible on screen, the light emitted by the surface may not contribute to the actual light level in the scene. For example, if you apply an emissive material to some geometry and then turn the camera so that it is no longer in view, the light being emitted by the surface might not show. If this occurs, try changing your camera perspective until part of the geometry is visible again, and the light will return.
How to Use Emissive Materials
One great way to use them to boost your scene’s realism is to apply them to digital screens. Have you ever looked at a rendered scene of a living room with a television, or an office full of computer monitors and felt there was something a little off? That’s because in real life, we are surrounded by glowing screens. Applying a low level emissive material can give your scene the authenticity it needs. Check out the living room below. It already looks pretty great, but the television and tablet appear a bit flat.
Select the texture on the screen using the pickup tool. You will see it in the albedo section of the Enscape Materials Editor. Just enable Self Illumination, and the screen will glow. Play around with the brightness; you probably won’t need it to be so bright that it contributes to the overall light level of the room – just bright enough to give off a visible glow. Depending on the situation, you can adjust the color of the light emitted to match. Above I did this with the television, but left the tablet with the default white light. Get creative!
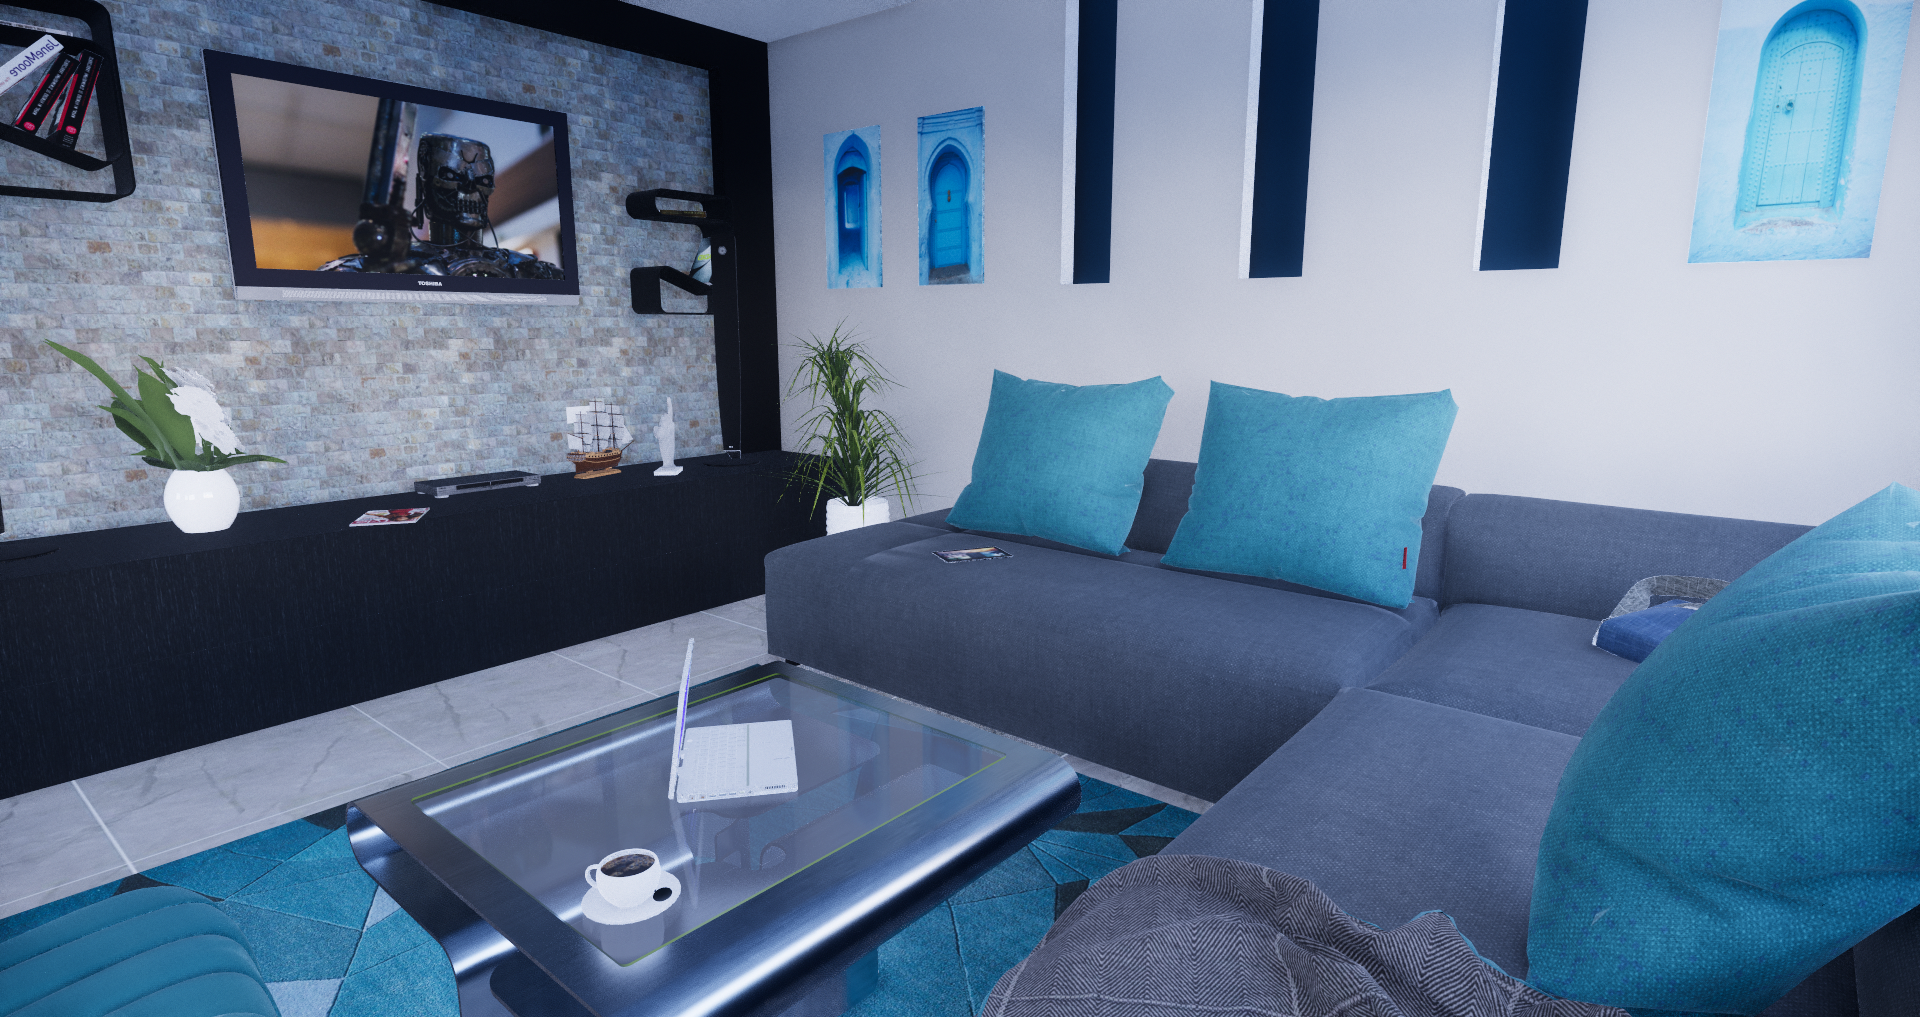
A comfortable living room scene
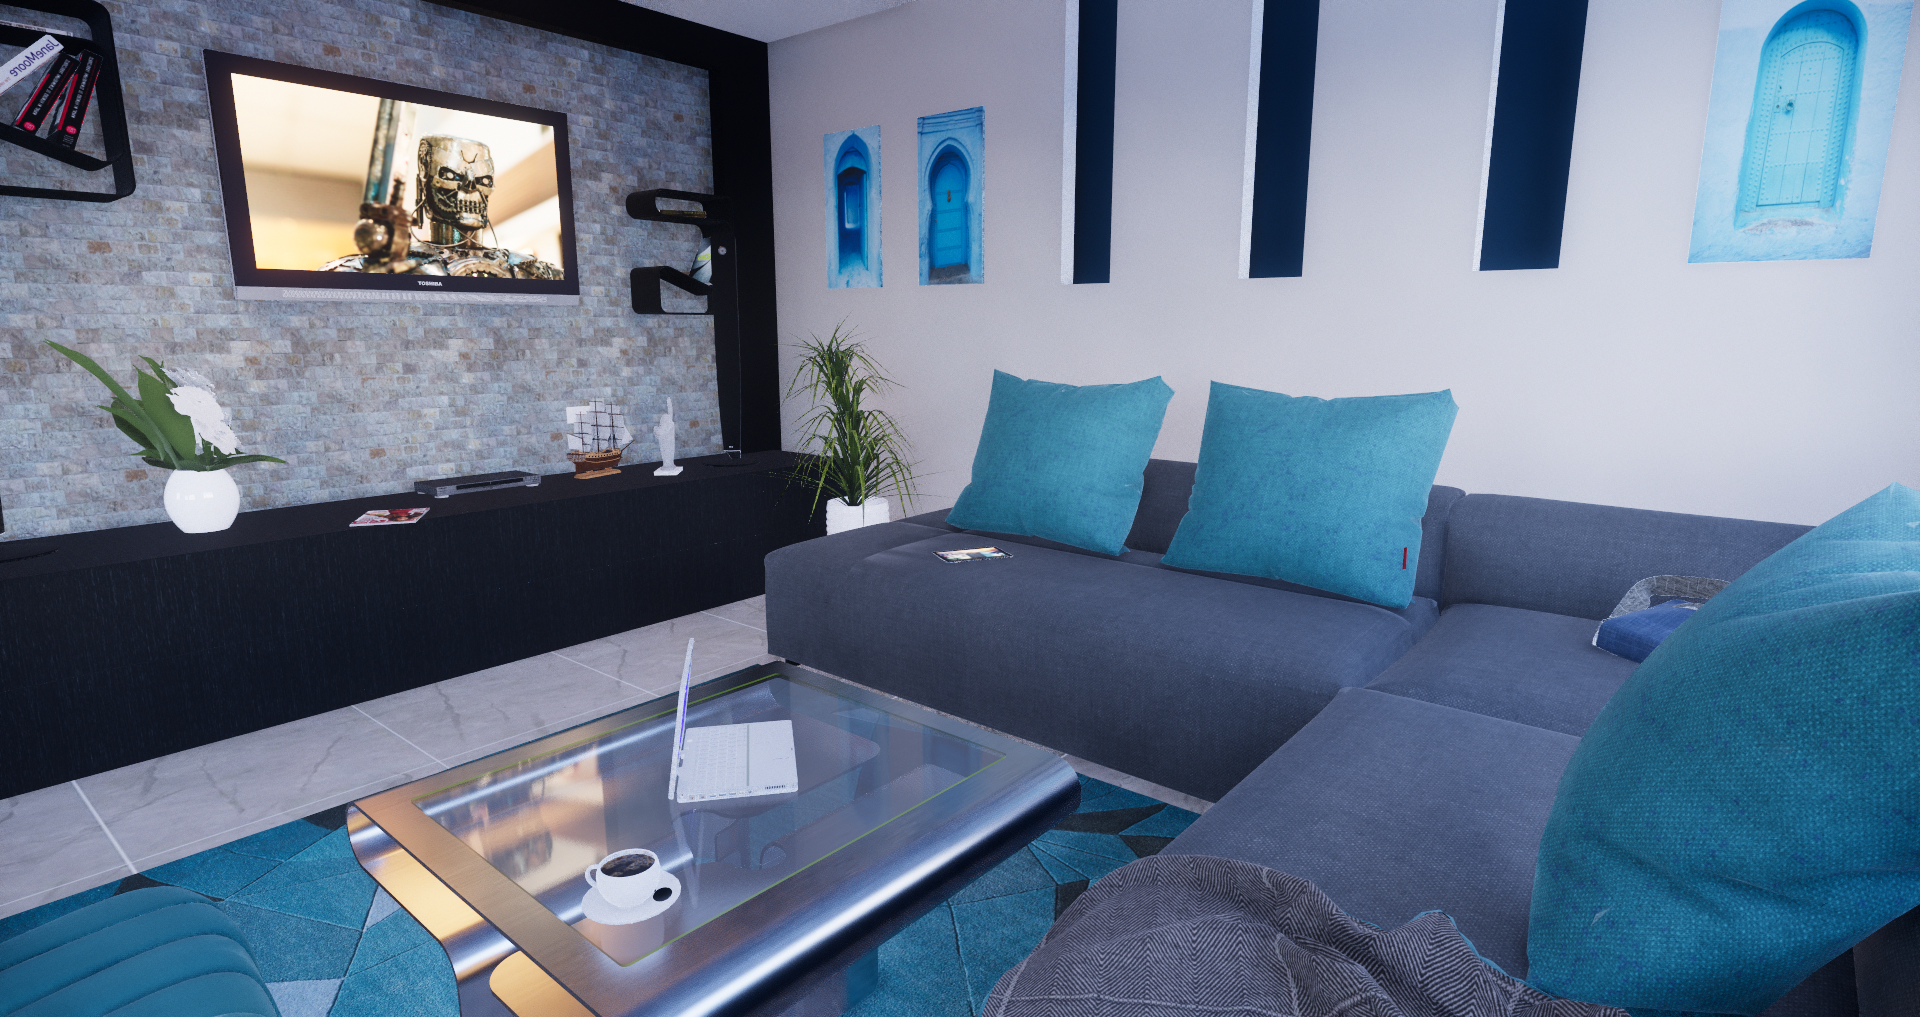
Check out that reflection on the coffee table!
Another way to apply emissive materials to enhance the authenticity of your scene is to apply them to small glowing elements we see every day. One of my favorite new ways to use emissive materials is to enhance car models. The car below is meant to be idling in the main drive, but none of its lights are illuminated, detracting from the realness of the scene. Illuminate a few materials, and it looks like it could drive away before your eyes.
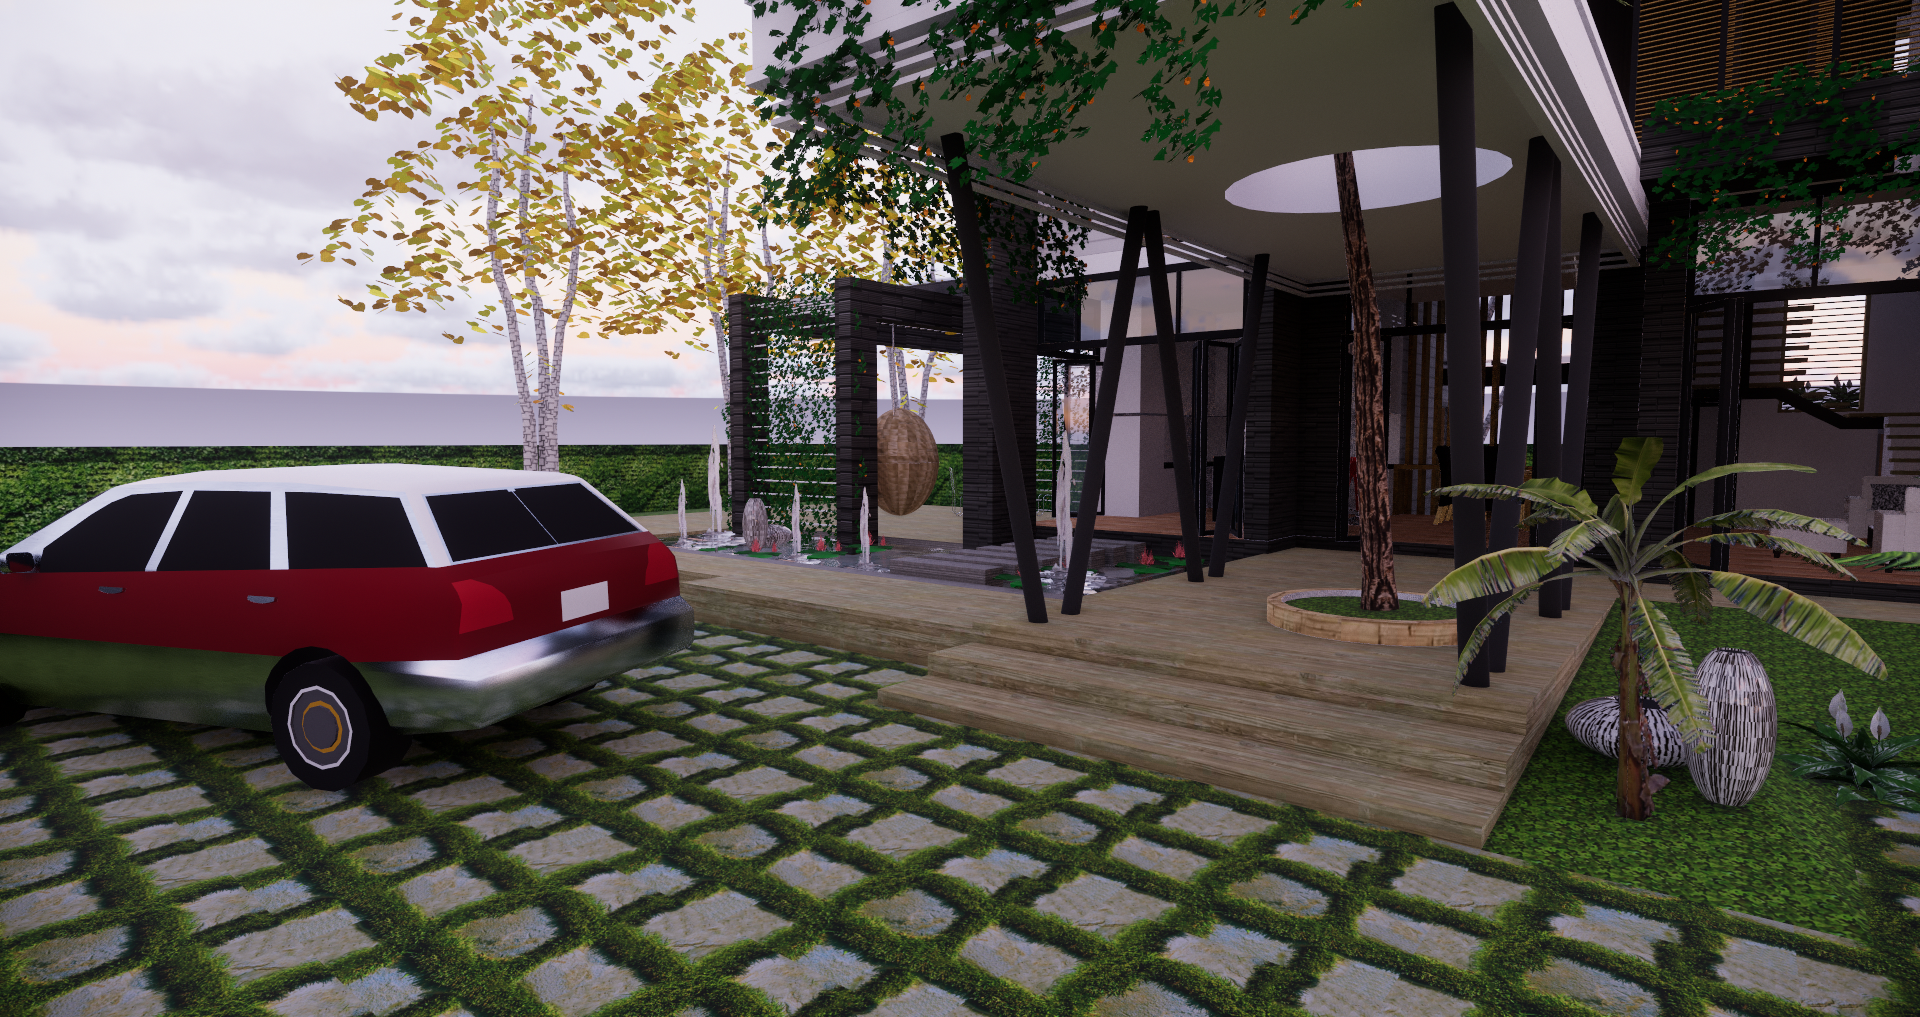
Just a little touch of light…
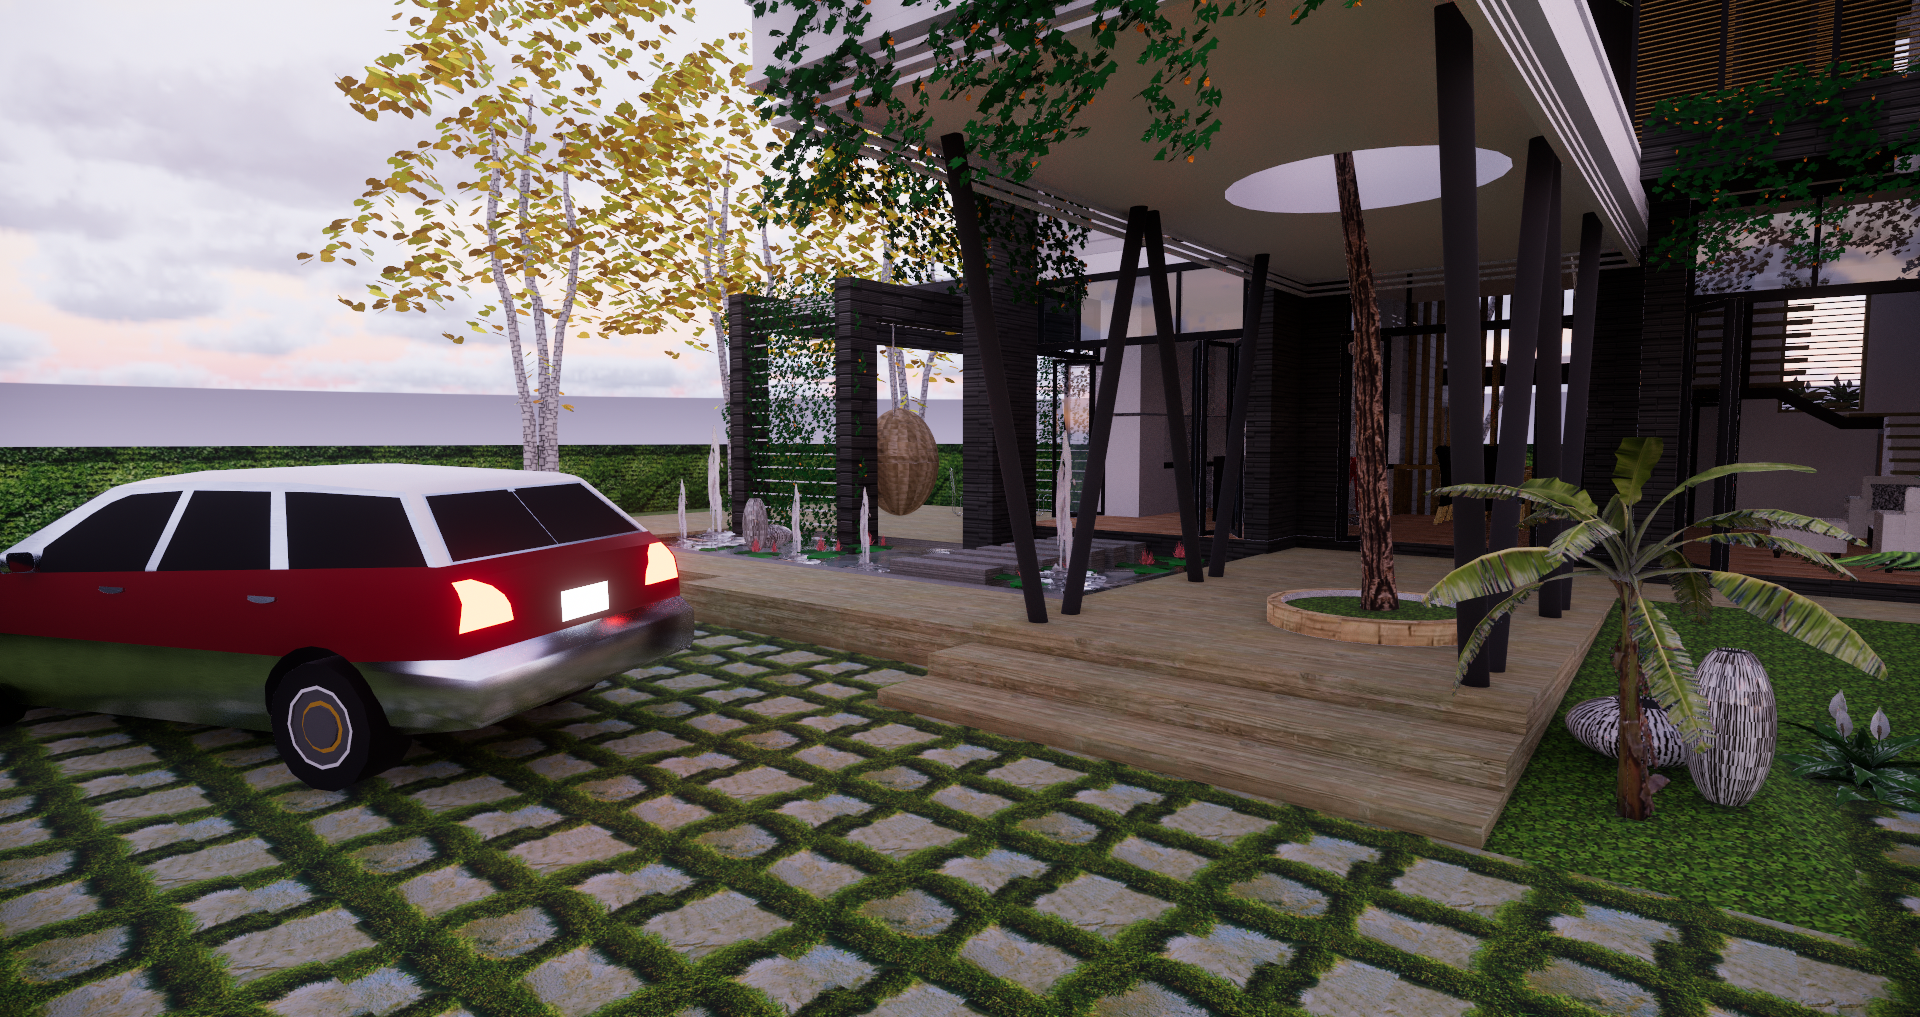
can make your scene much more authentic!
Emissive materials are also perfect when you want to create a lighting effect similar to an LED light, or for lighting up areas that are tricky to get to with artificial lights. Take for example recessed ceiling lighting, or LED lights that are installed along the tops of cabinets. These types of lights are seen both in residential houses and in office buildings or stores.
Achieving this effect with artificial lights can be time consuming, and might not give you the result you are looking for. Instead, try using emissive materials. It’s usually quick and easy, because the geometry already exists. Just apply an emissive material to the right spot, and it will give the effect of an LED light rail installed in a recessed space.
Emissive Versus Artificial
So what is it important to consider when weighing emissive materials against artificial lights? Oftentimes it is not entirely clear which type of light might be the best for your situation. Take a look at the table below for a quick overview.
| Emissive | Artificial light | |
|---|---|---|
| Shape and Size | Illuminate every possible surface and shape | Restricted to certain types and sizes (Spot, sphere, rectangle, disk, linear) |
| Light | Potentially noisy, especially if powerful and small | Almost noise free |
| Shadows | Rather blurry | Sharper |
| Bounce light | Needs one indirect bounce to be visible at all | Directly visible, therefore have one indirect bounce more than emissive |
| Customization | Change the color and apply a texture to illuminate | Only color can be changed |
| Performance | Cause less performance strain than artificial lights | Many artificial light sources can impact your real-time performance |
| Visibility | Light can appear to turn off if the camera does not see the source | Light is always visible, even if the camera is not facing the source |
| Light Level Adjustments | Must be individually dimmed or brightened | Can be collectively turned on and off via the Enscape Setting menu |
| Source | Emits light, and shows where the light is emitted from | Emits light, but shows no visible source |
Size and Shape: Emissive materials can be applied to any size or shape of geometry. There is basically no limit to your creativity! Artificial lights, on the other hand, have pre-defined shapes and sizes.
Light: Diffuse light is potentially very noisy, especially if the emissive surface is small and bright. In these situations, it’s a better idea to use an area or point light, as artificial lights are virtually noise free.
Shadows: The light emitted by self-illuminated materials casts fuzzier, very blurry shadows. If you are looking for sharp, clean differentiations between light and dark, you might try a spot light instead.
Bounce light: The light given off by emissive materials has one bounce less than artificial lights. This results in the light not being able to bounce around many corners. Artificial lights bounce one time more and are therefore generally brighter.
Customization: You can apply a color to your artificial lights if you want to create a certain atmosphere or effect. However, emissive materials allow you to illuminate not only a color, but also an applied texture, leaving no limit on your creativity.
Performance: Placing many artificial light sources in your project can impact your performance, even if you have a top of the line graphics card. Using emissive materials to replace artificial light sources can improve your performance if you find your project lagging.
Visibility: It can be the case that the light from emissive materials seems to turn off when the source is not directly visible to the camera. You might find that if the light source is behind the camera, the emitted light will disappear as well. The light cast by artificial lights is always visible.
Light Level Adjustments: You can adjust the individual brightness of you artificial lights, but if you want them to be collectively brighter, or turn them all off, you can do this using the Light Brightness slider in the Advanced tab of the Enscape Settings menu. This setting does not affect emissive materials: if you want to dim or turn them off, you’ll need to adjust each material’s settings individually.
Source: Emissive materials emit light and show where the light is being emitted from; their light source is visible. With artificial lights, you will only see the light emitted, but not the source of that light in the form of a point or shape.
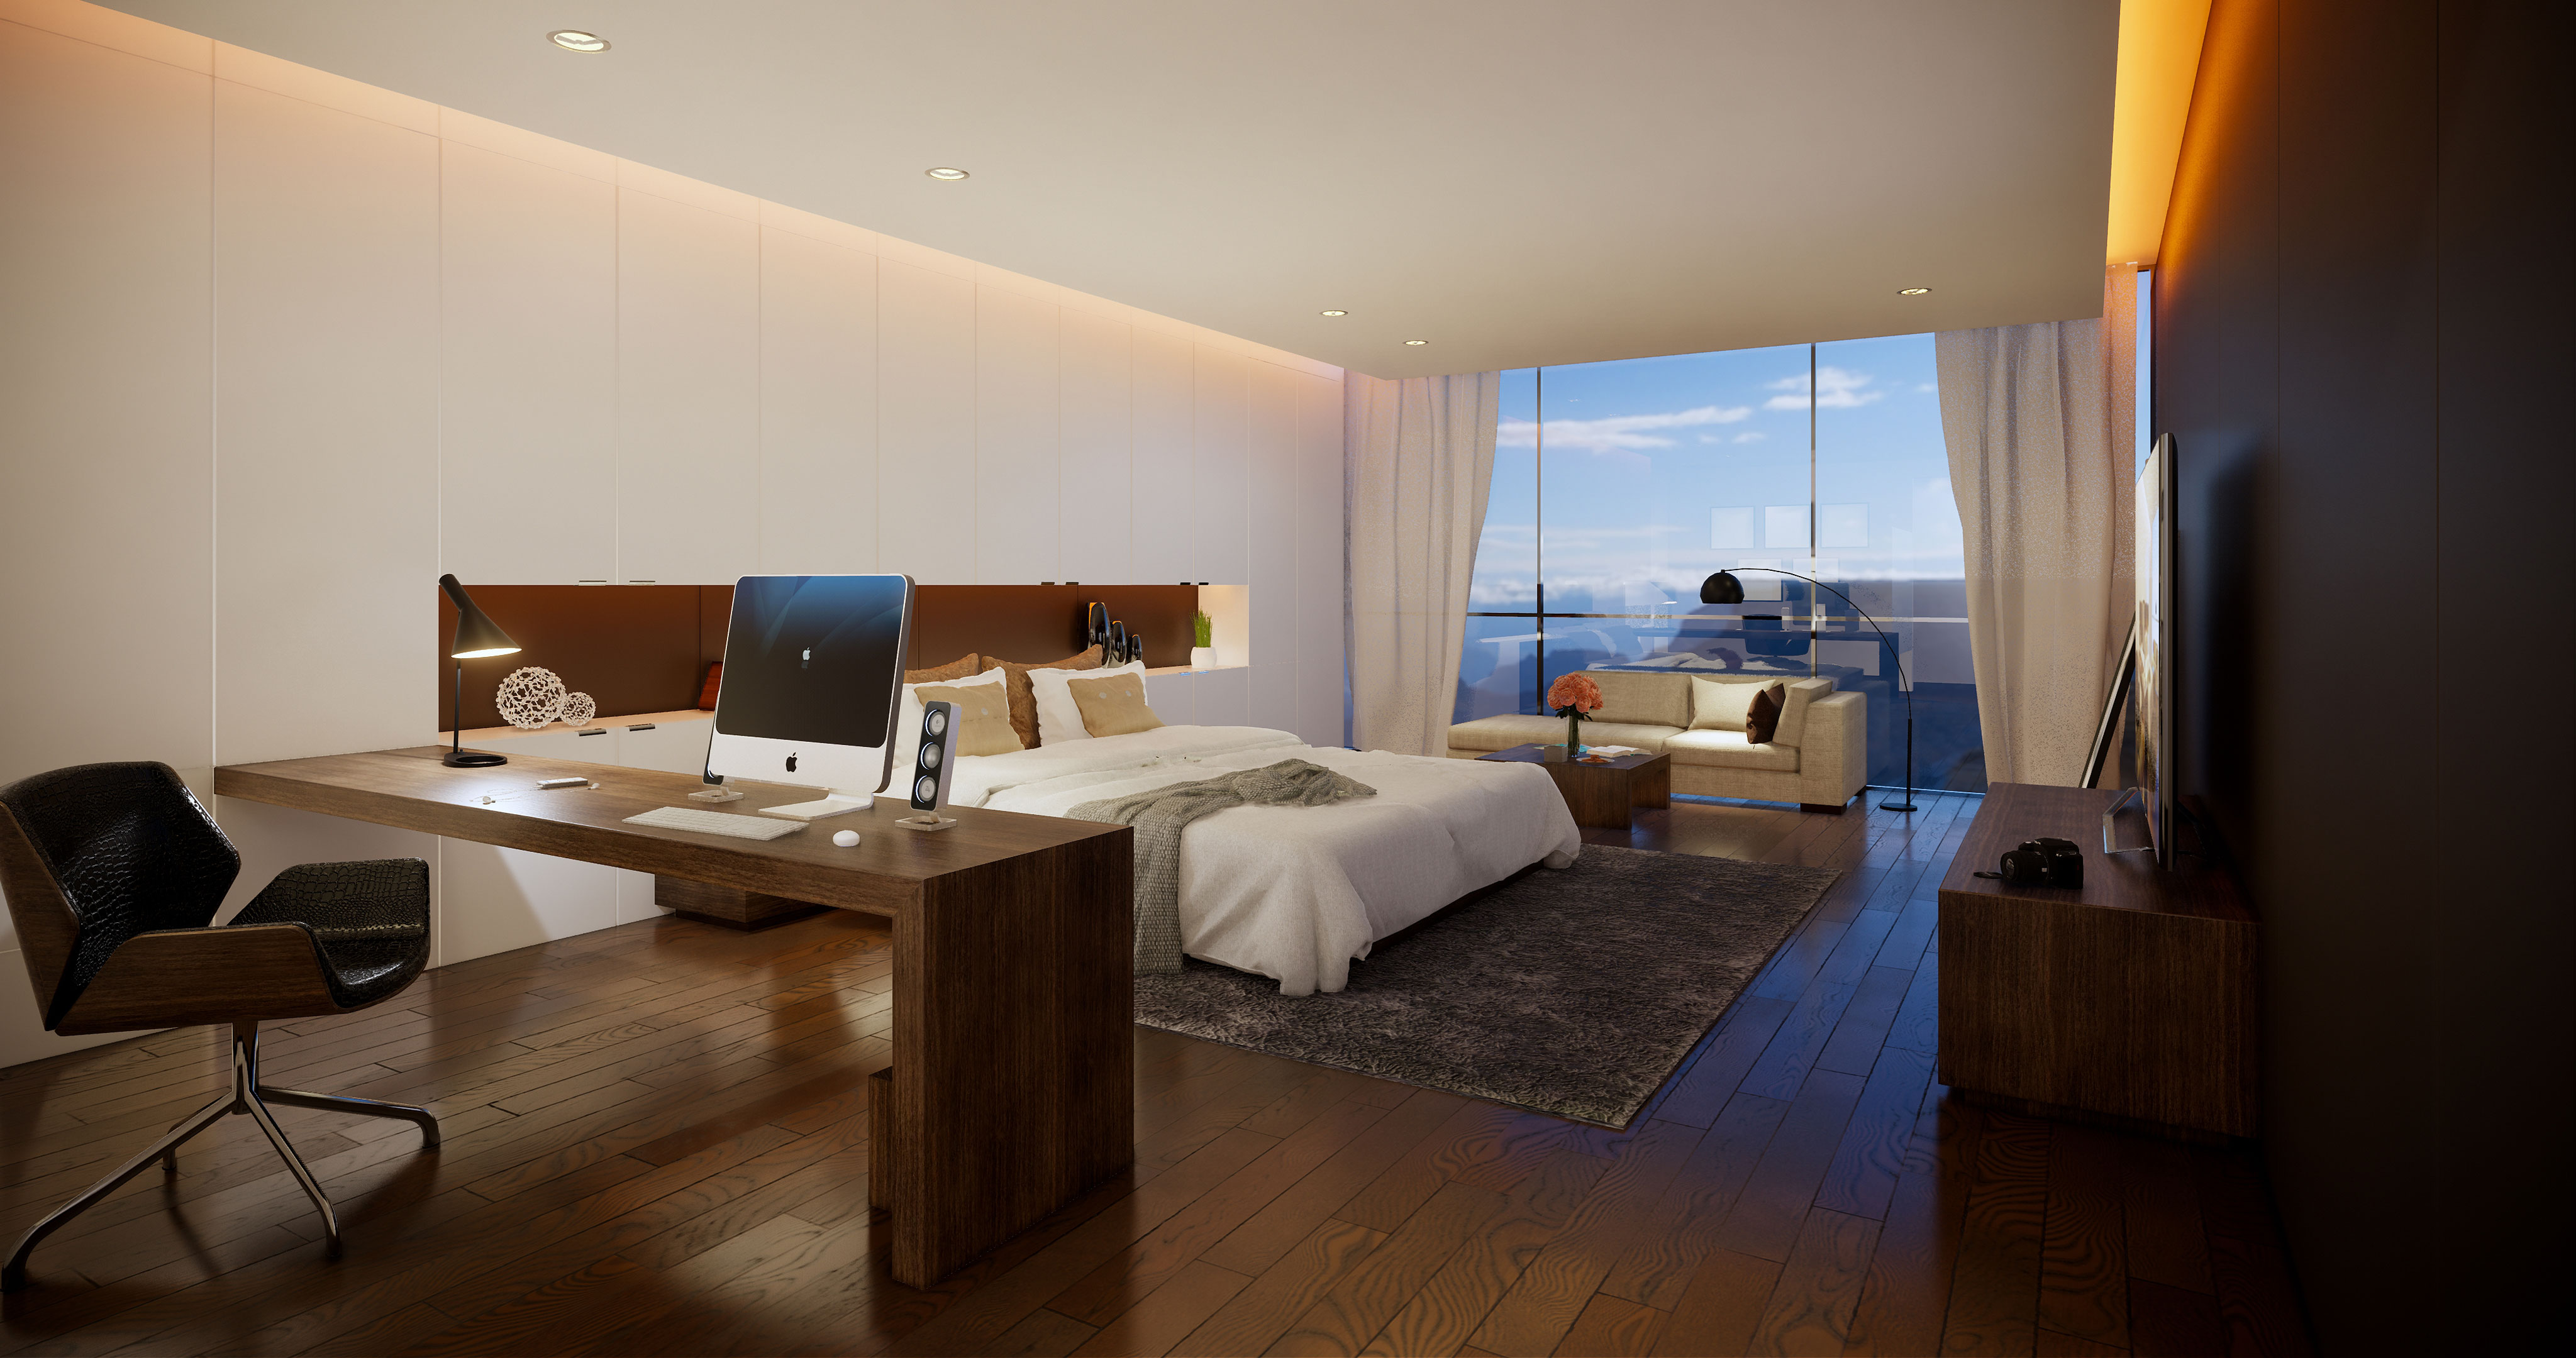
Rendering by Enscape Forum User Tas_1985
Conclusion
Emissive materials have numerous benefits, and can transform your project in terms of realism. They are easy to apply, and even easier to customize. Using emissive materials to make your screens glow and to achieve the effect of LED lighting is an easy way to add interesting elements to your project that draw the eye and spark the imagination. In terms of client presentations, it’s not simply about showing the project: it’s about creating and presenting a surrounding they could actually see themselves in. And with emissive materials, creating this world doesn’t have to take forever.
Finding the right combination and balance of emissive materials and artificial lights can be the difference between peaking your client’s interest, and making their dream project a reality. It’s important to know when to best use which type of light to achieve the effect you are going for. Take the time to carefully consider which light will serve you best, and you’ll end up blowing them away.